Roof Solar Install
We have been using the external solar panels for about 12 years now and they have worked quite well.
The major issue is the setup
time to put the rack together. If we go for a weekend it takes more time to setup the solar
than it is worth.
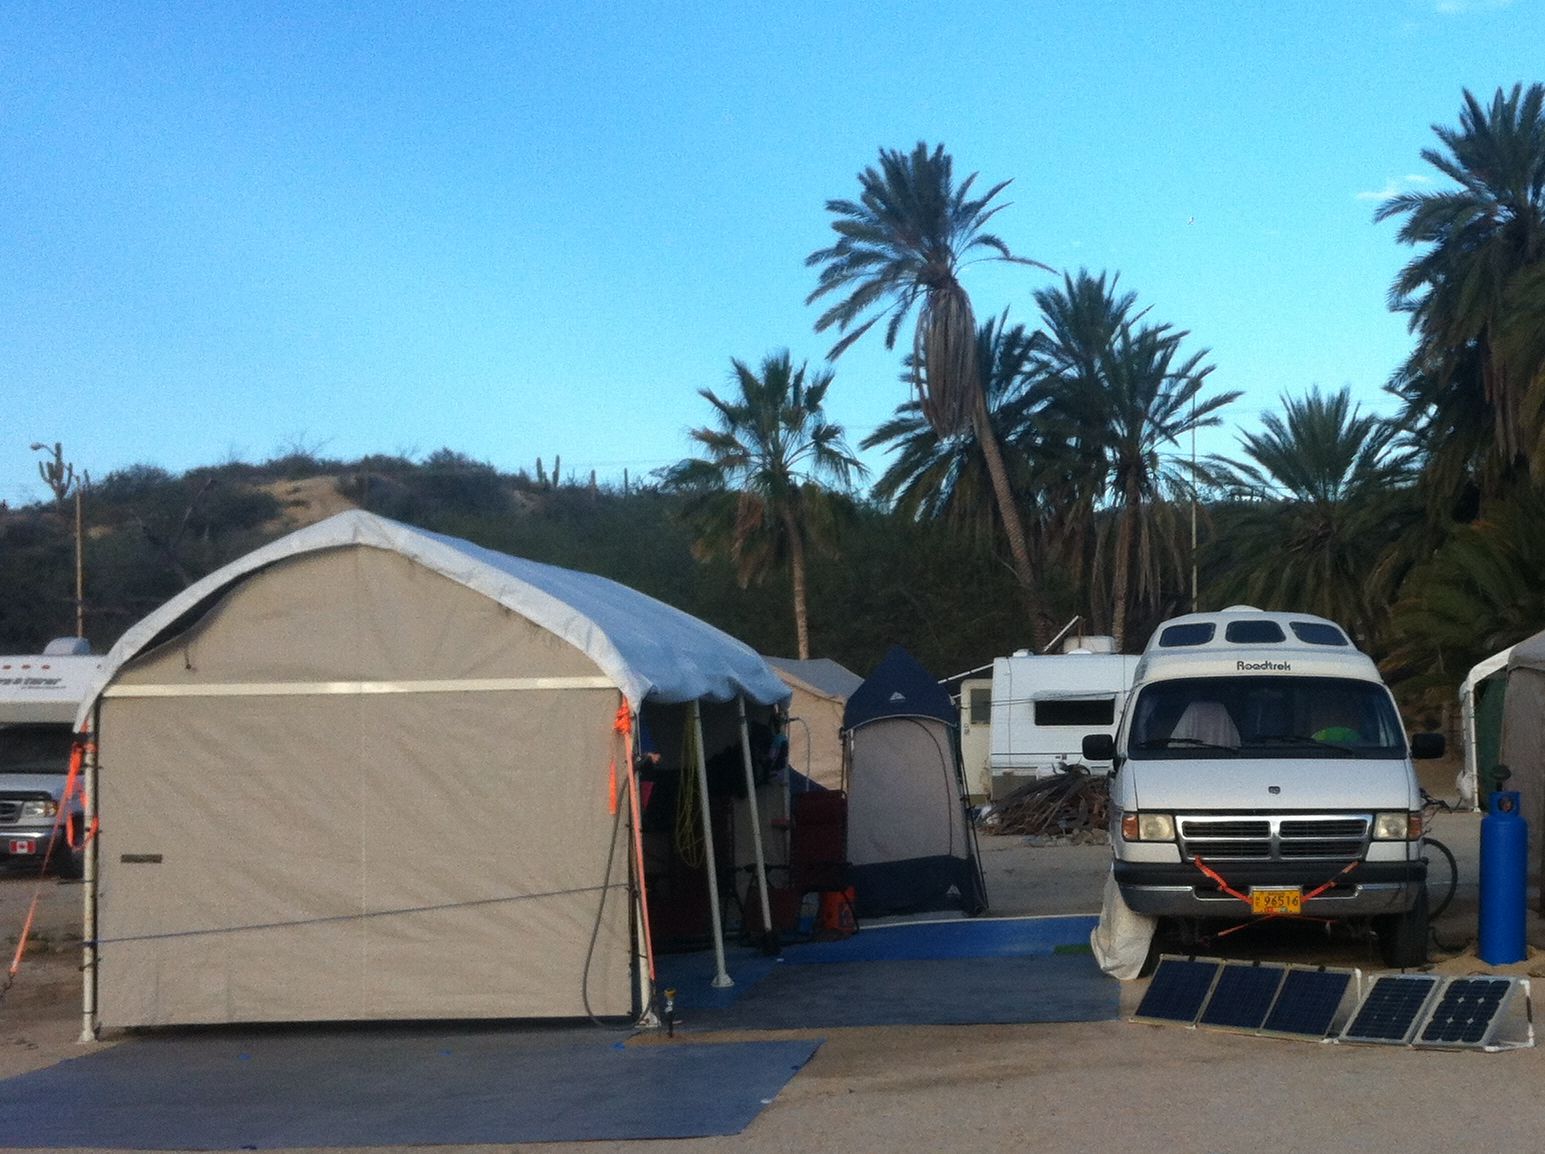
We decided to put a panel on top.
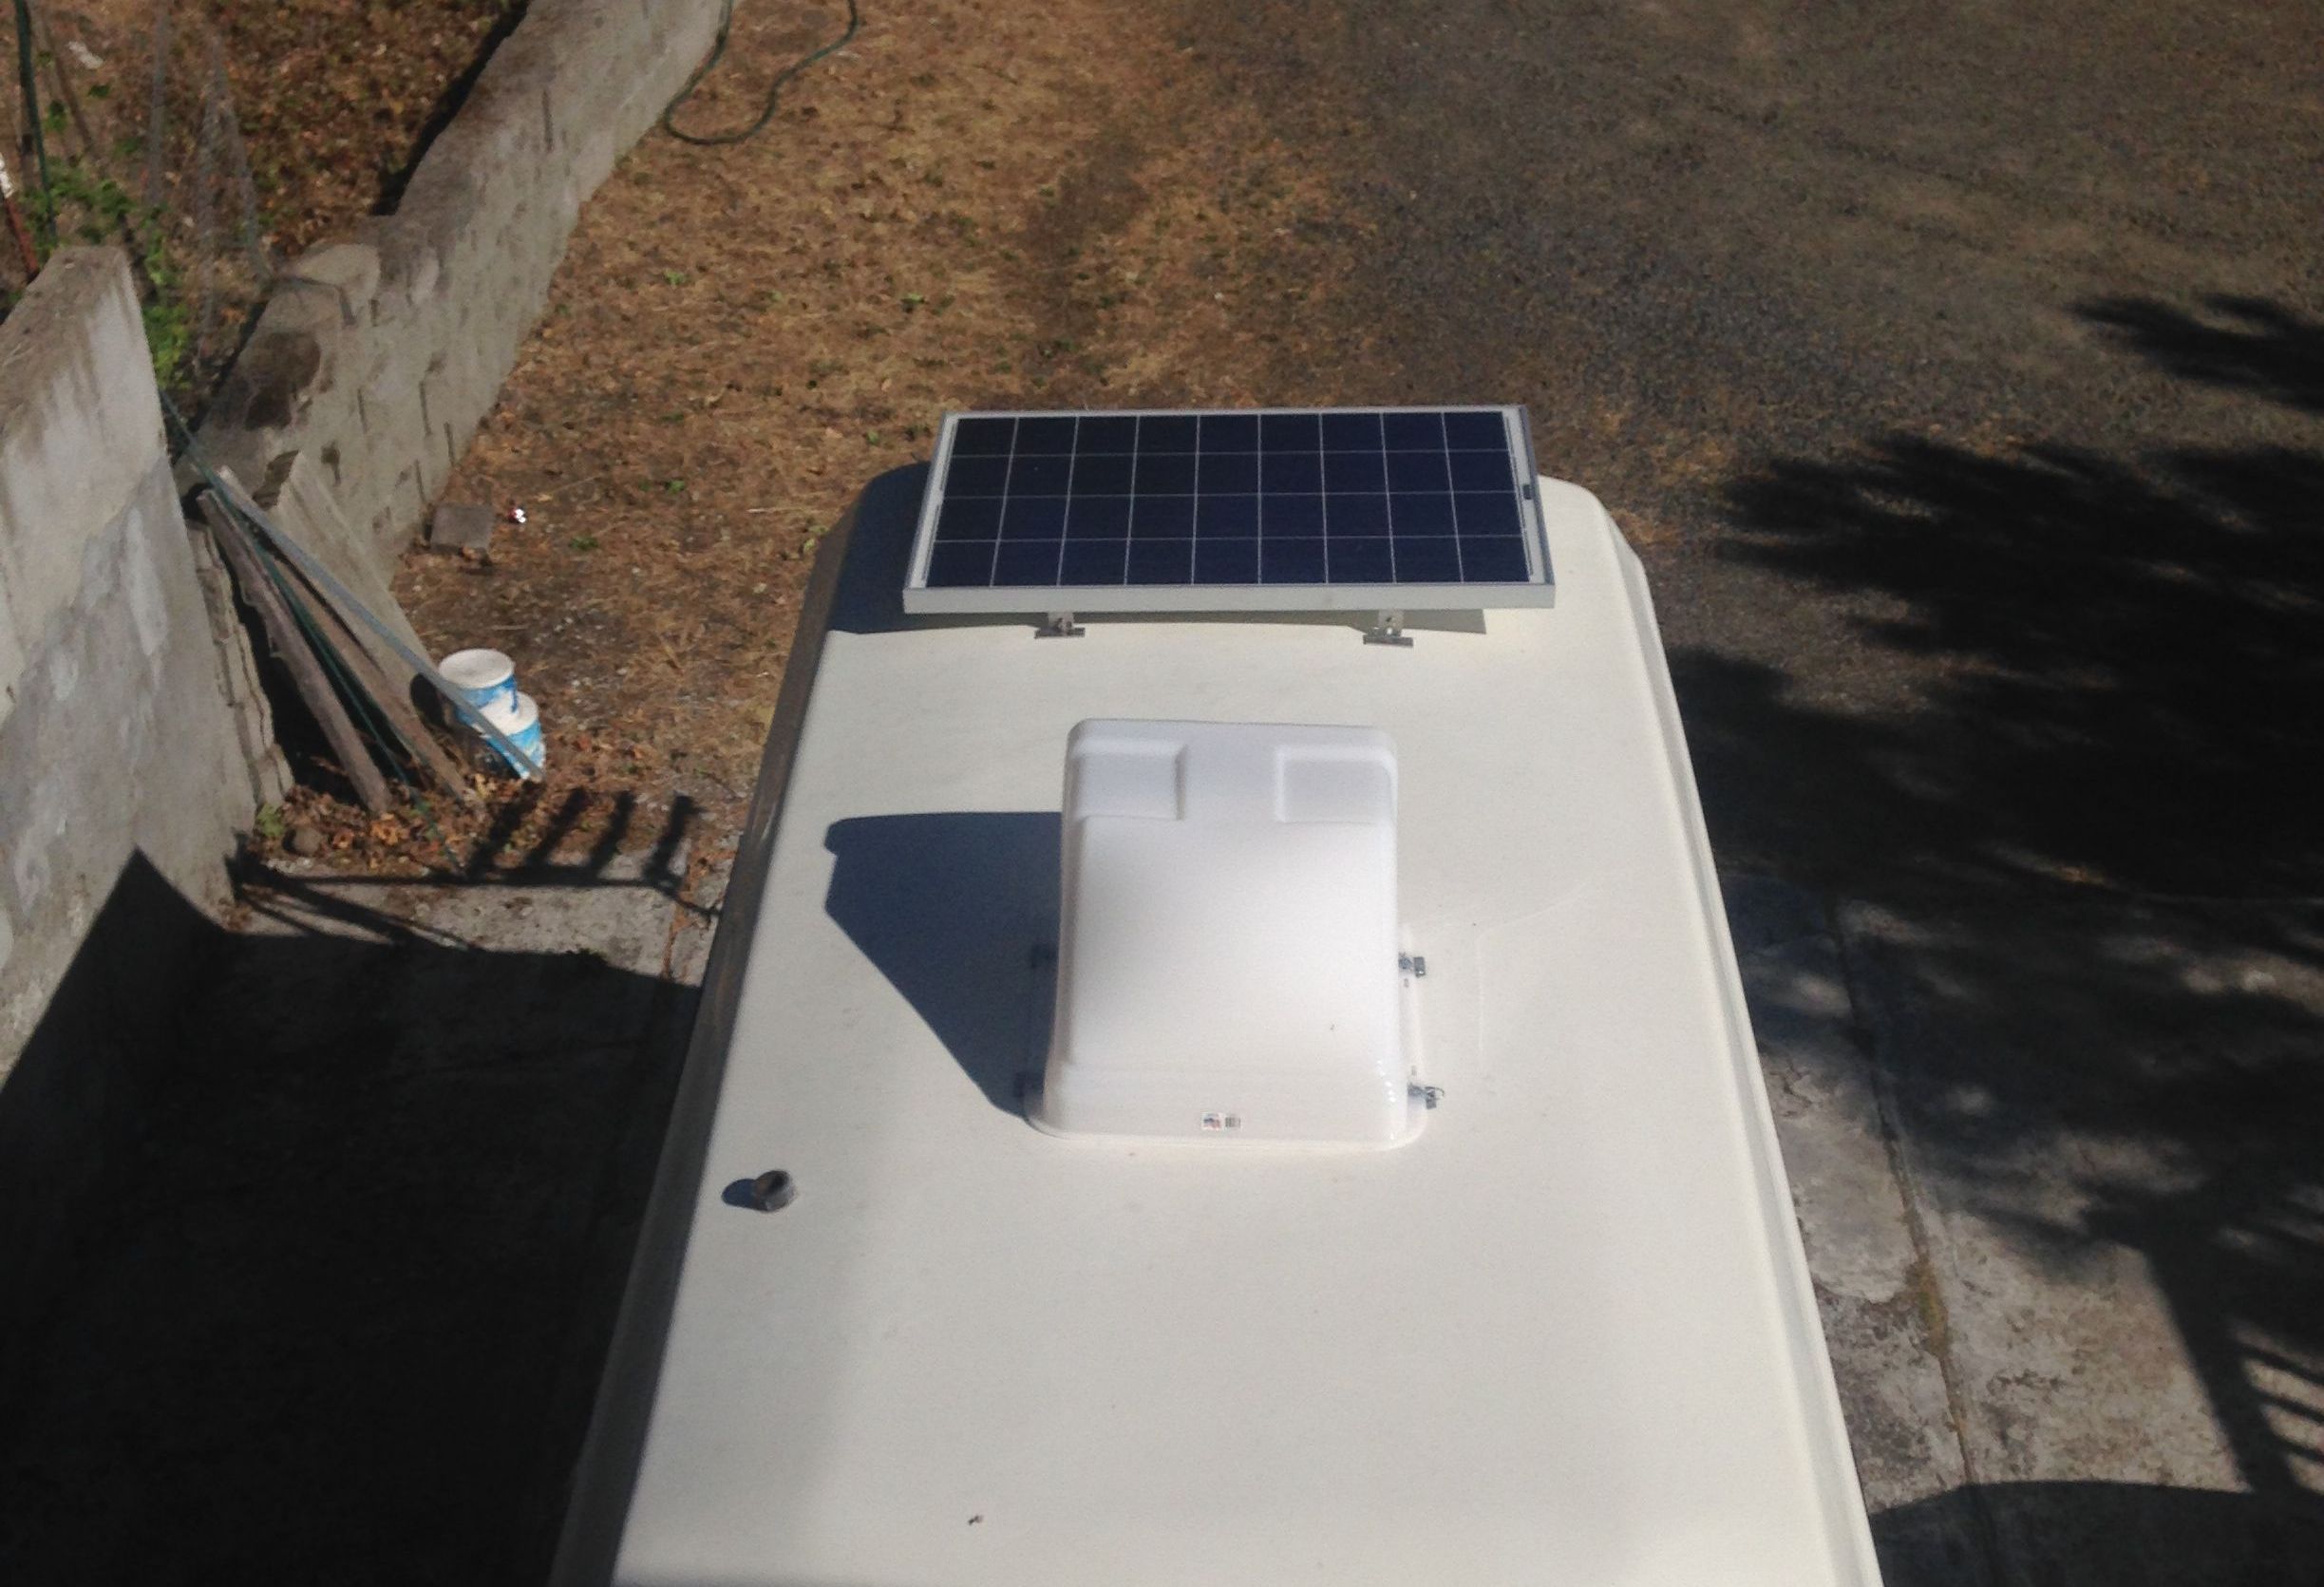
One major reason for not putting the solar on the roof to begin with was the mounting system. In the past you had
to drill the fiberglass roof
which I did not like. That has now changed with some of the new 3M tape that was created to connect
fiberglass and aluminum. The tape
is not cheap but you can purchase "Sticky Feet" with the tape installed.
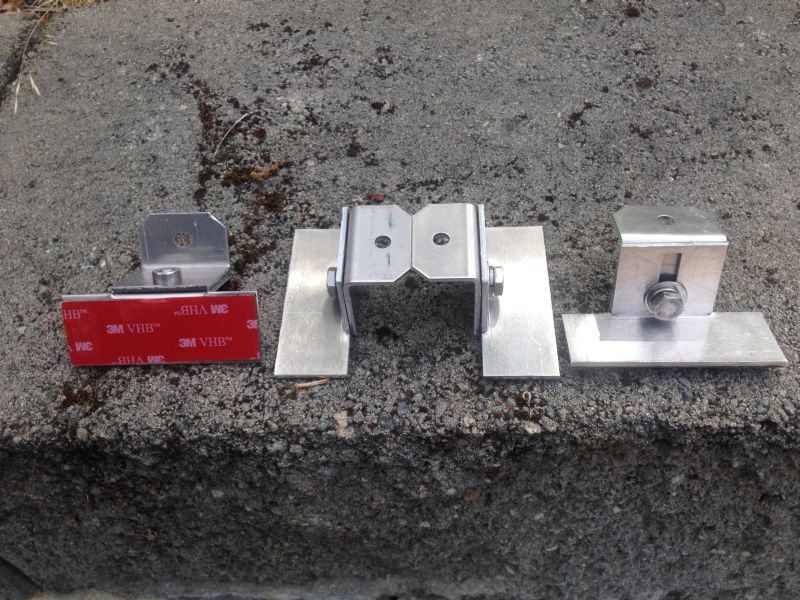
The instulation procedue requires that the fiberglass be cleaned with 50% rubbing alochol. The feet come with the ability to
adjust the
height by about an inch so you can use the adjustment as needed to level the panel. You can also put a slight slope to the
panel so water
will all run to the bottom and keep the panel cleaner. I talked to the guy who sells these and he has done something like
450
installs with out a failure.
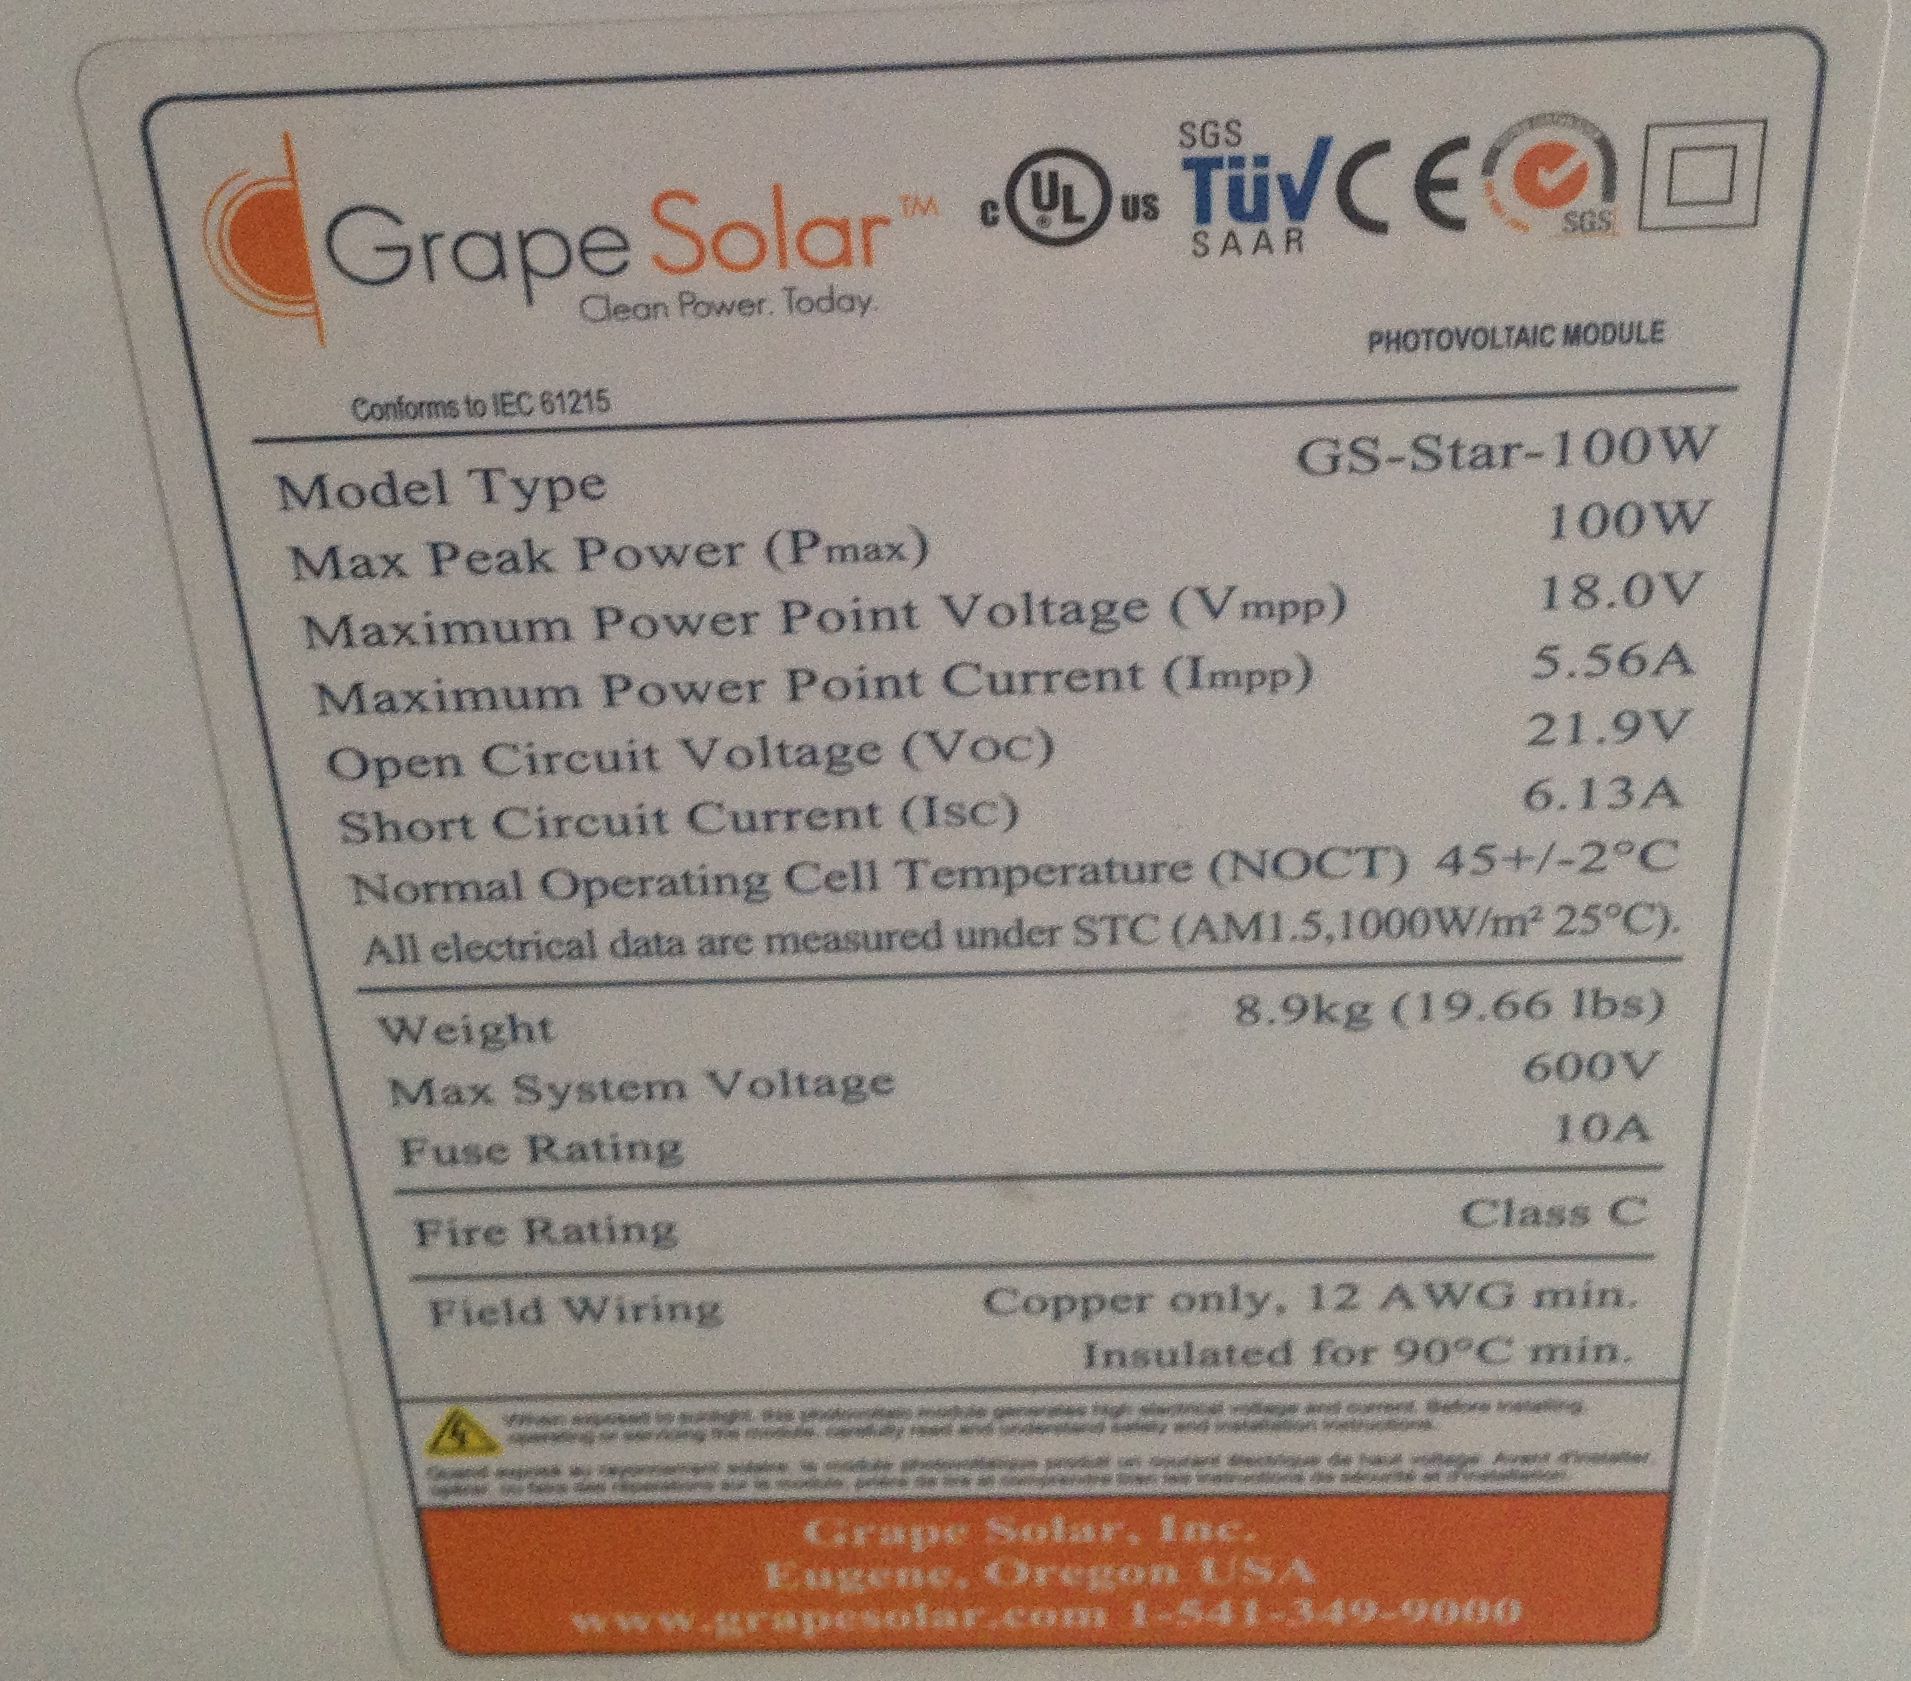
The next question is the choice of panel and placement. After some research, I decided on the Grape Solar GS100. We had been living
on
100 watts for the last 10 years and it worked okay by including LED lights and tablet computers. The GS100 physical size is
40.2 X 26.4
inches. This is smaller than most other 100 watt panels. By placing it very near the rear of the van, I believe
there is room for 2
more panels this size. One would go ahead of the vent and the other just behind the vent. There might be some
shading of the one just
behind the vent if you have the Fantastic Fan cover installed as I do but we would live with that.
Due to questions about which panel this is, I have added the tag from the back.
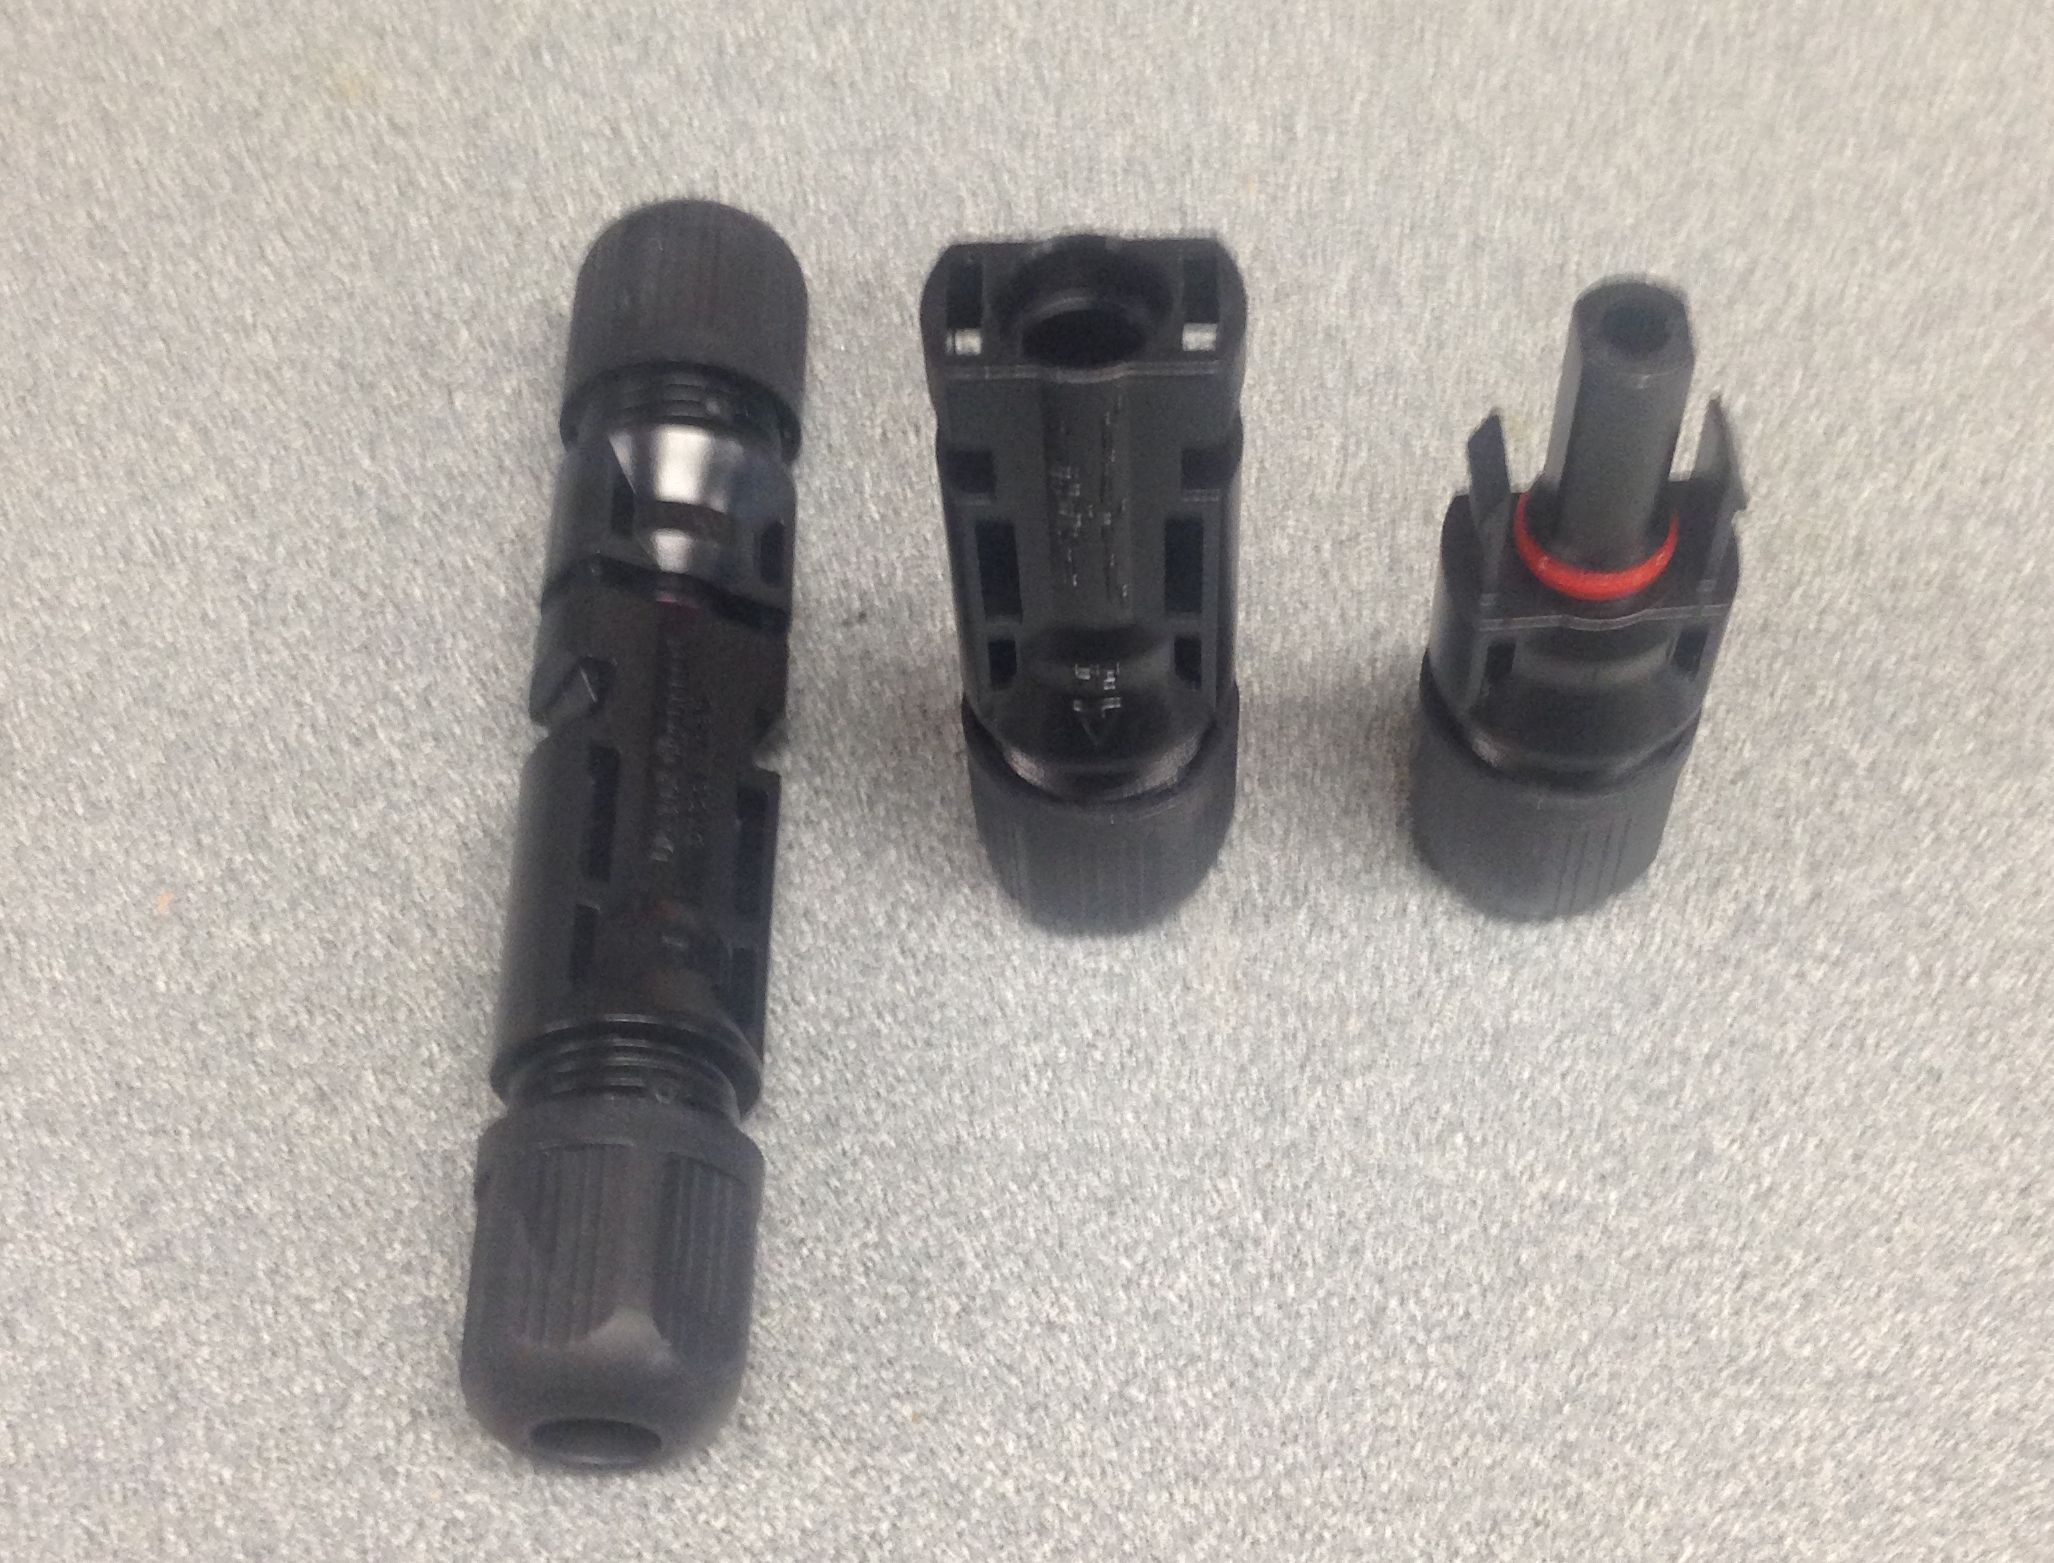
The GS100 panel comes with MC4 cable connectors so I purchased one to connect up my feed wire. This also makes a convienent place
to disconnect the panel if that is needed.
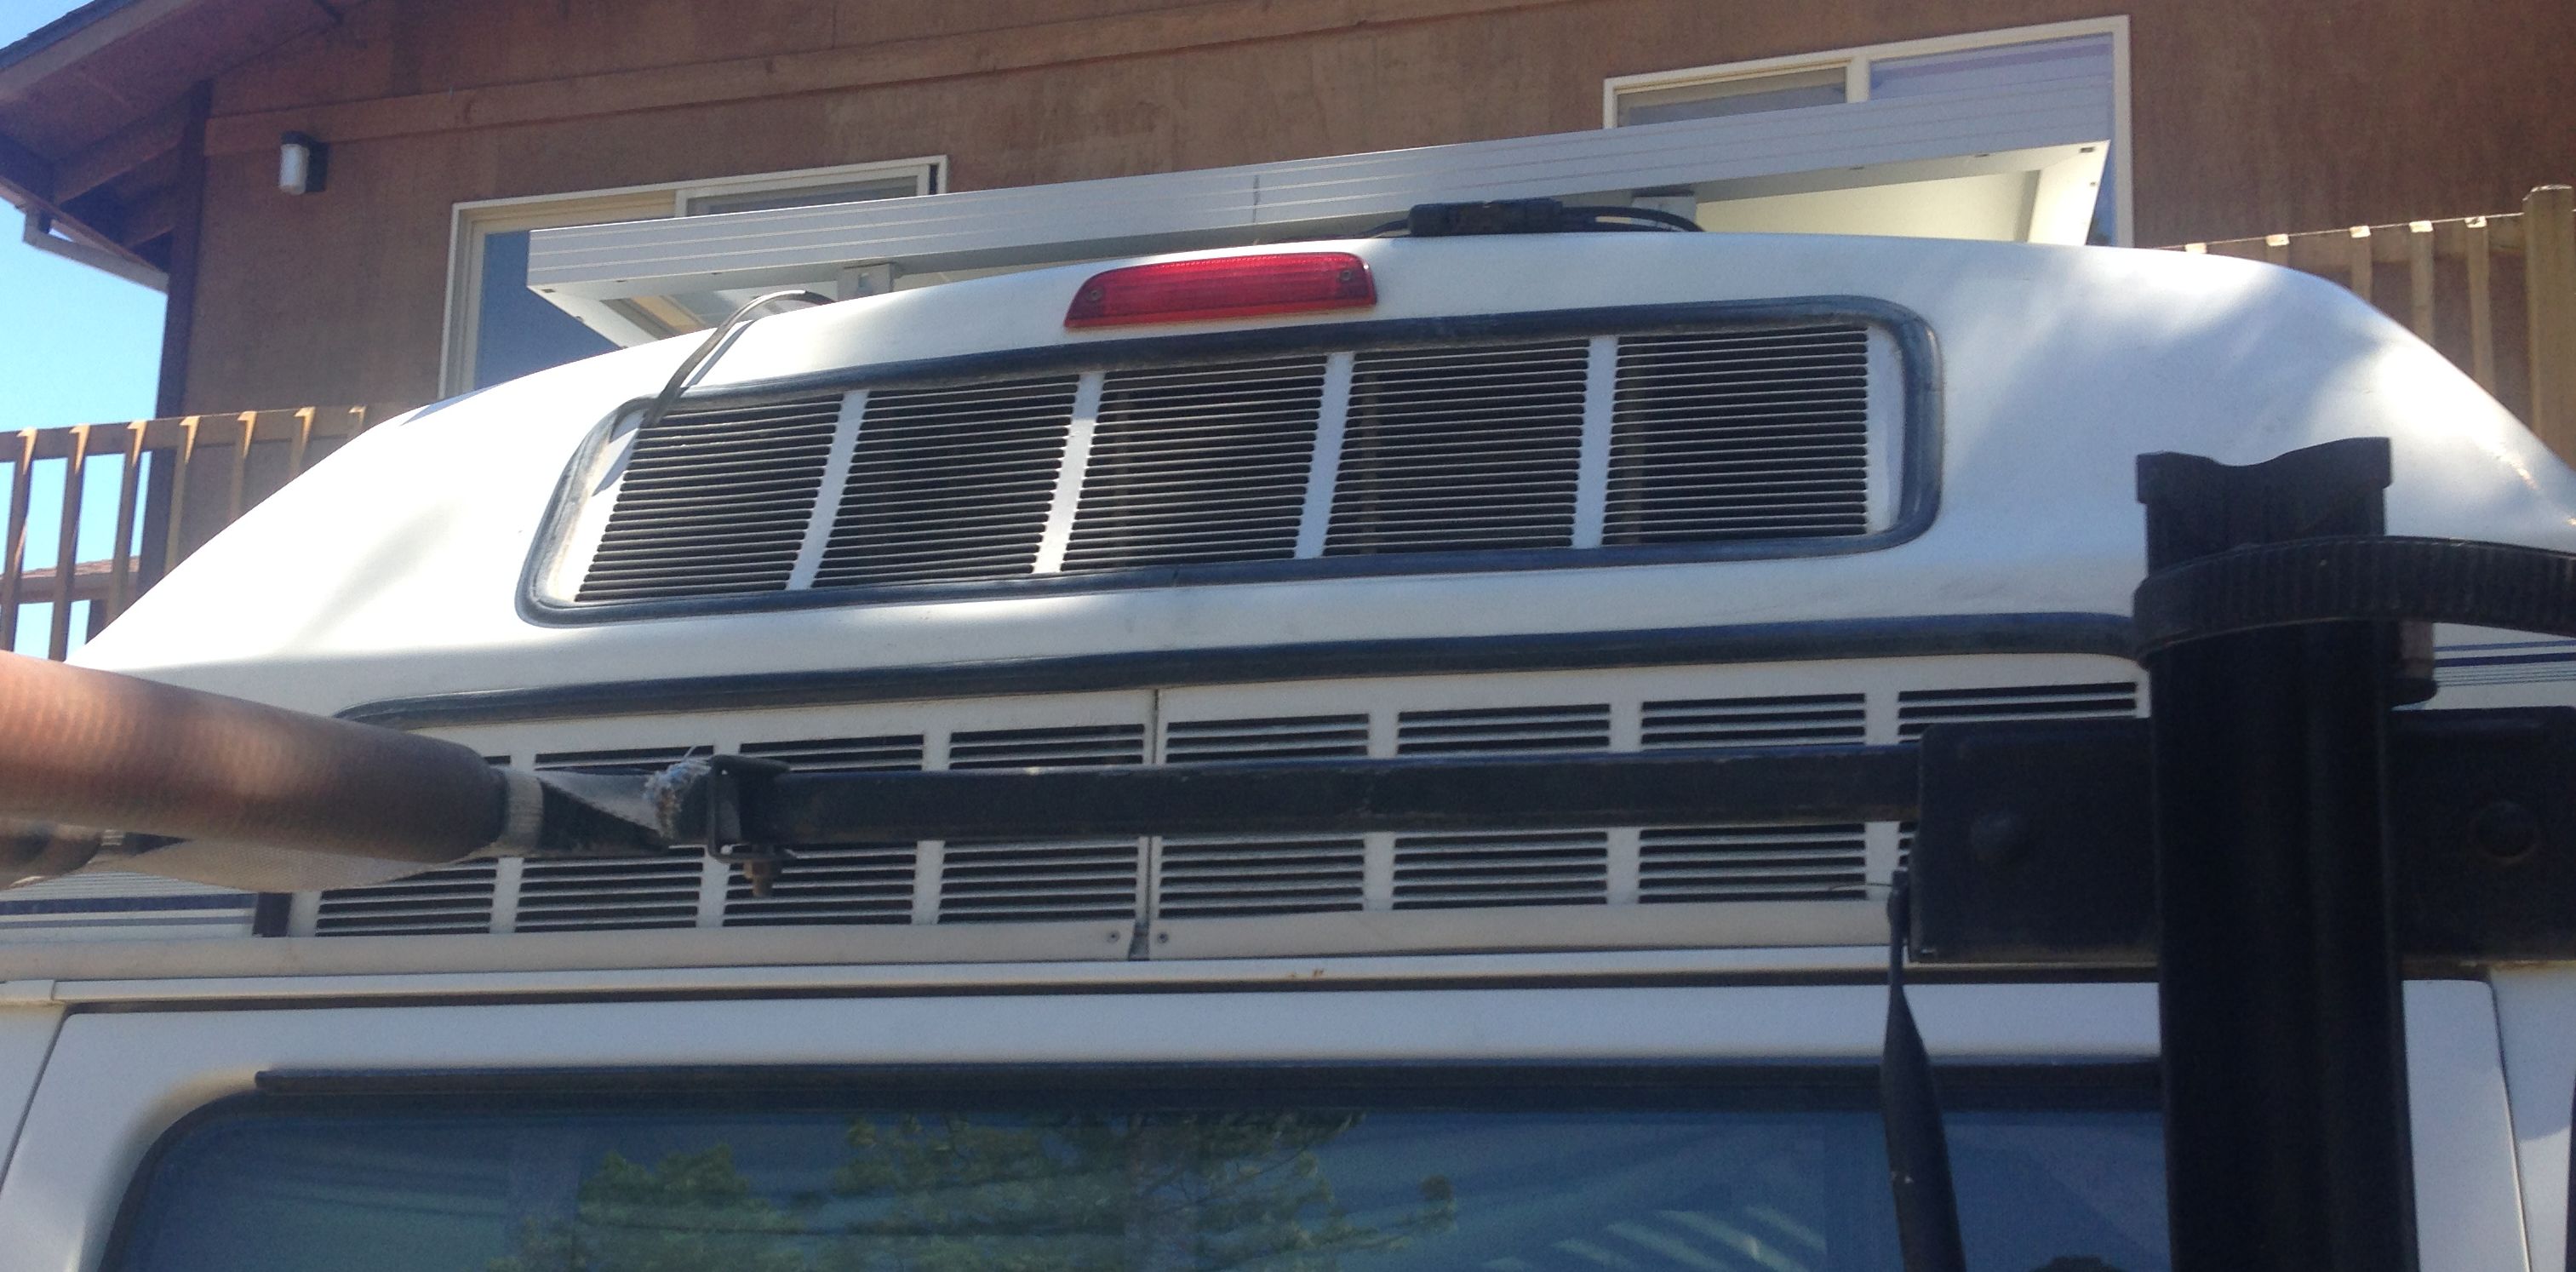
There was a place on the side of the airconditioner vent where I could drill a hole and it would come into the drivers side
storage cabinet.
The wire was fed through the hole and then silicon was put around the wire to keep unwanted things from getting
into the cabinet.
The number 12 wire was then run along the top of the cabinet and a second hole was drilled to allow entry into the stereo cabinet.
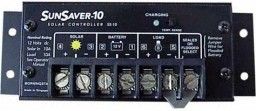
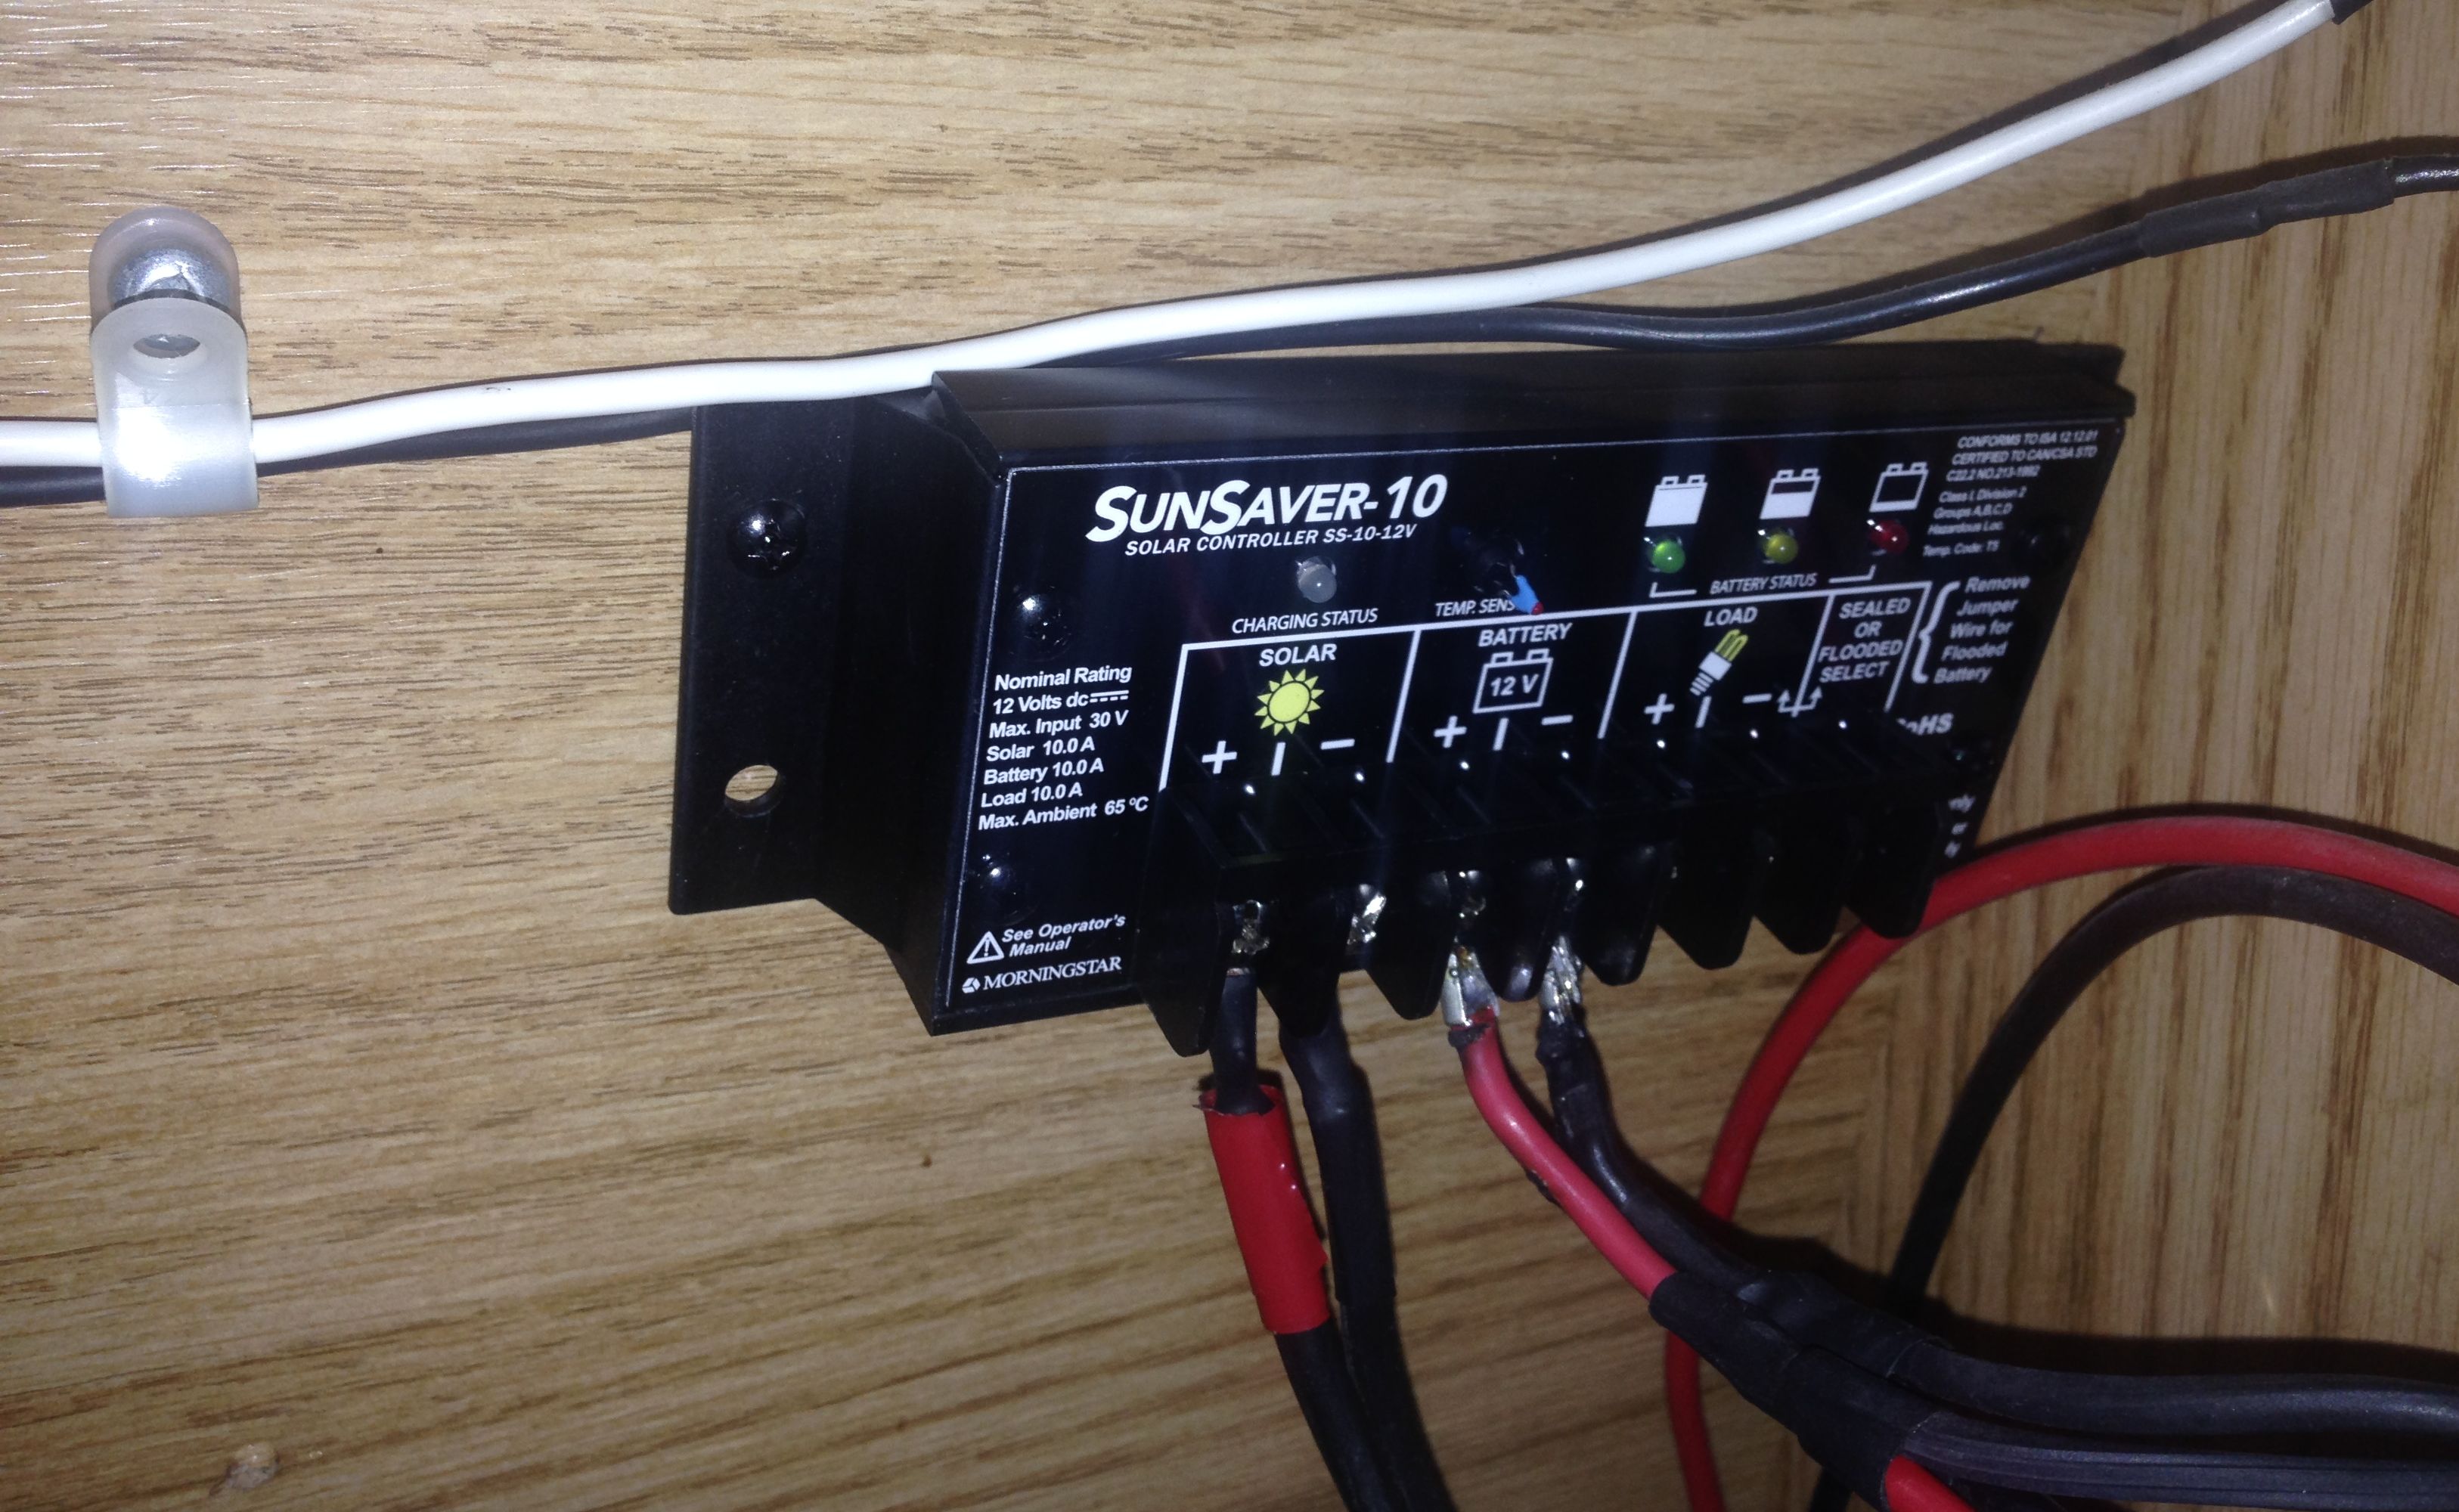
Since I had run a number 10 wire from the house battery to the back of the stereo cabinet, it was easy to mount a controller there
and use the existing wiring.
I chose the SunSaver 10 controller because it shares well with other controllers. I have another one which is used on my external
solar
array and they can be connected in parallel with no problem.
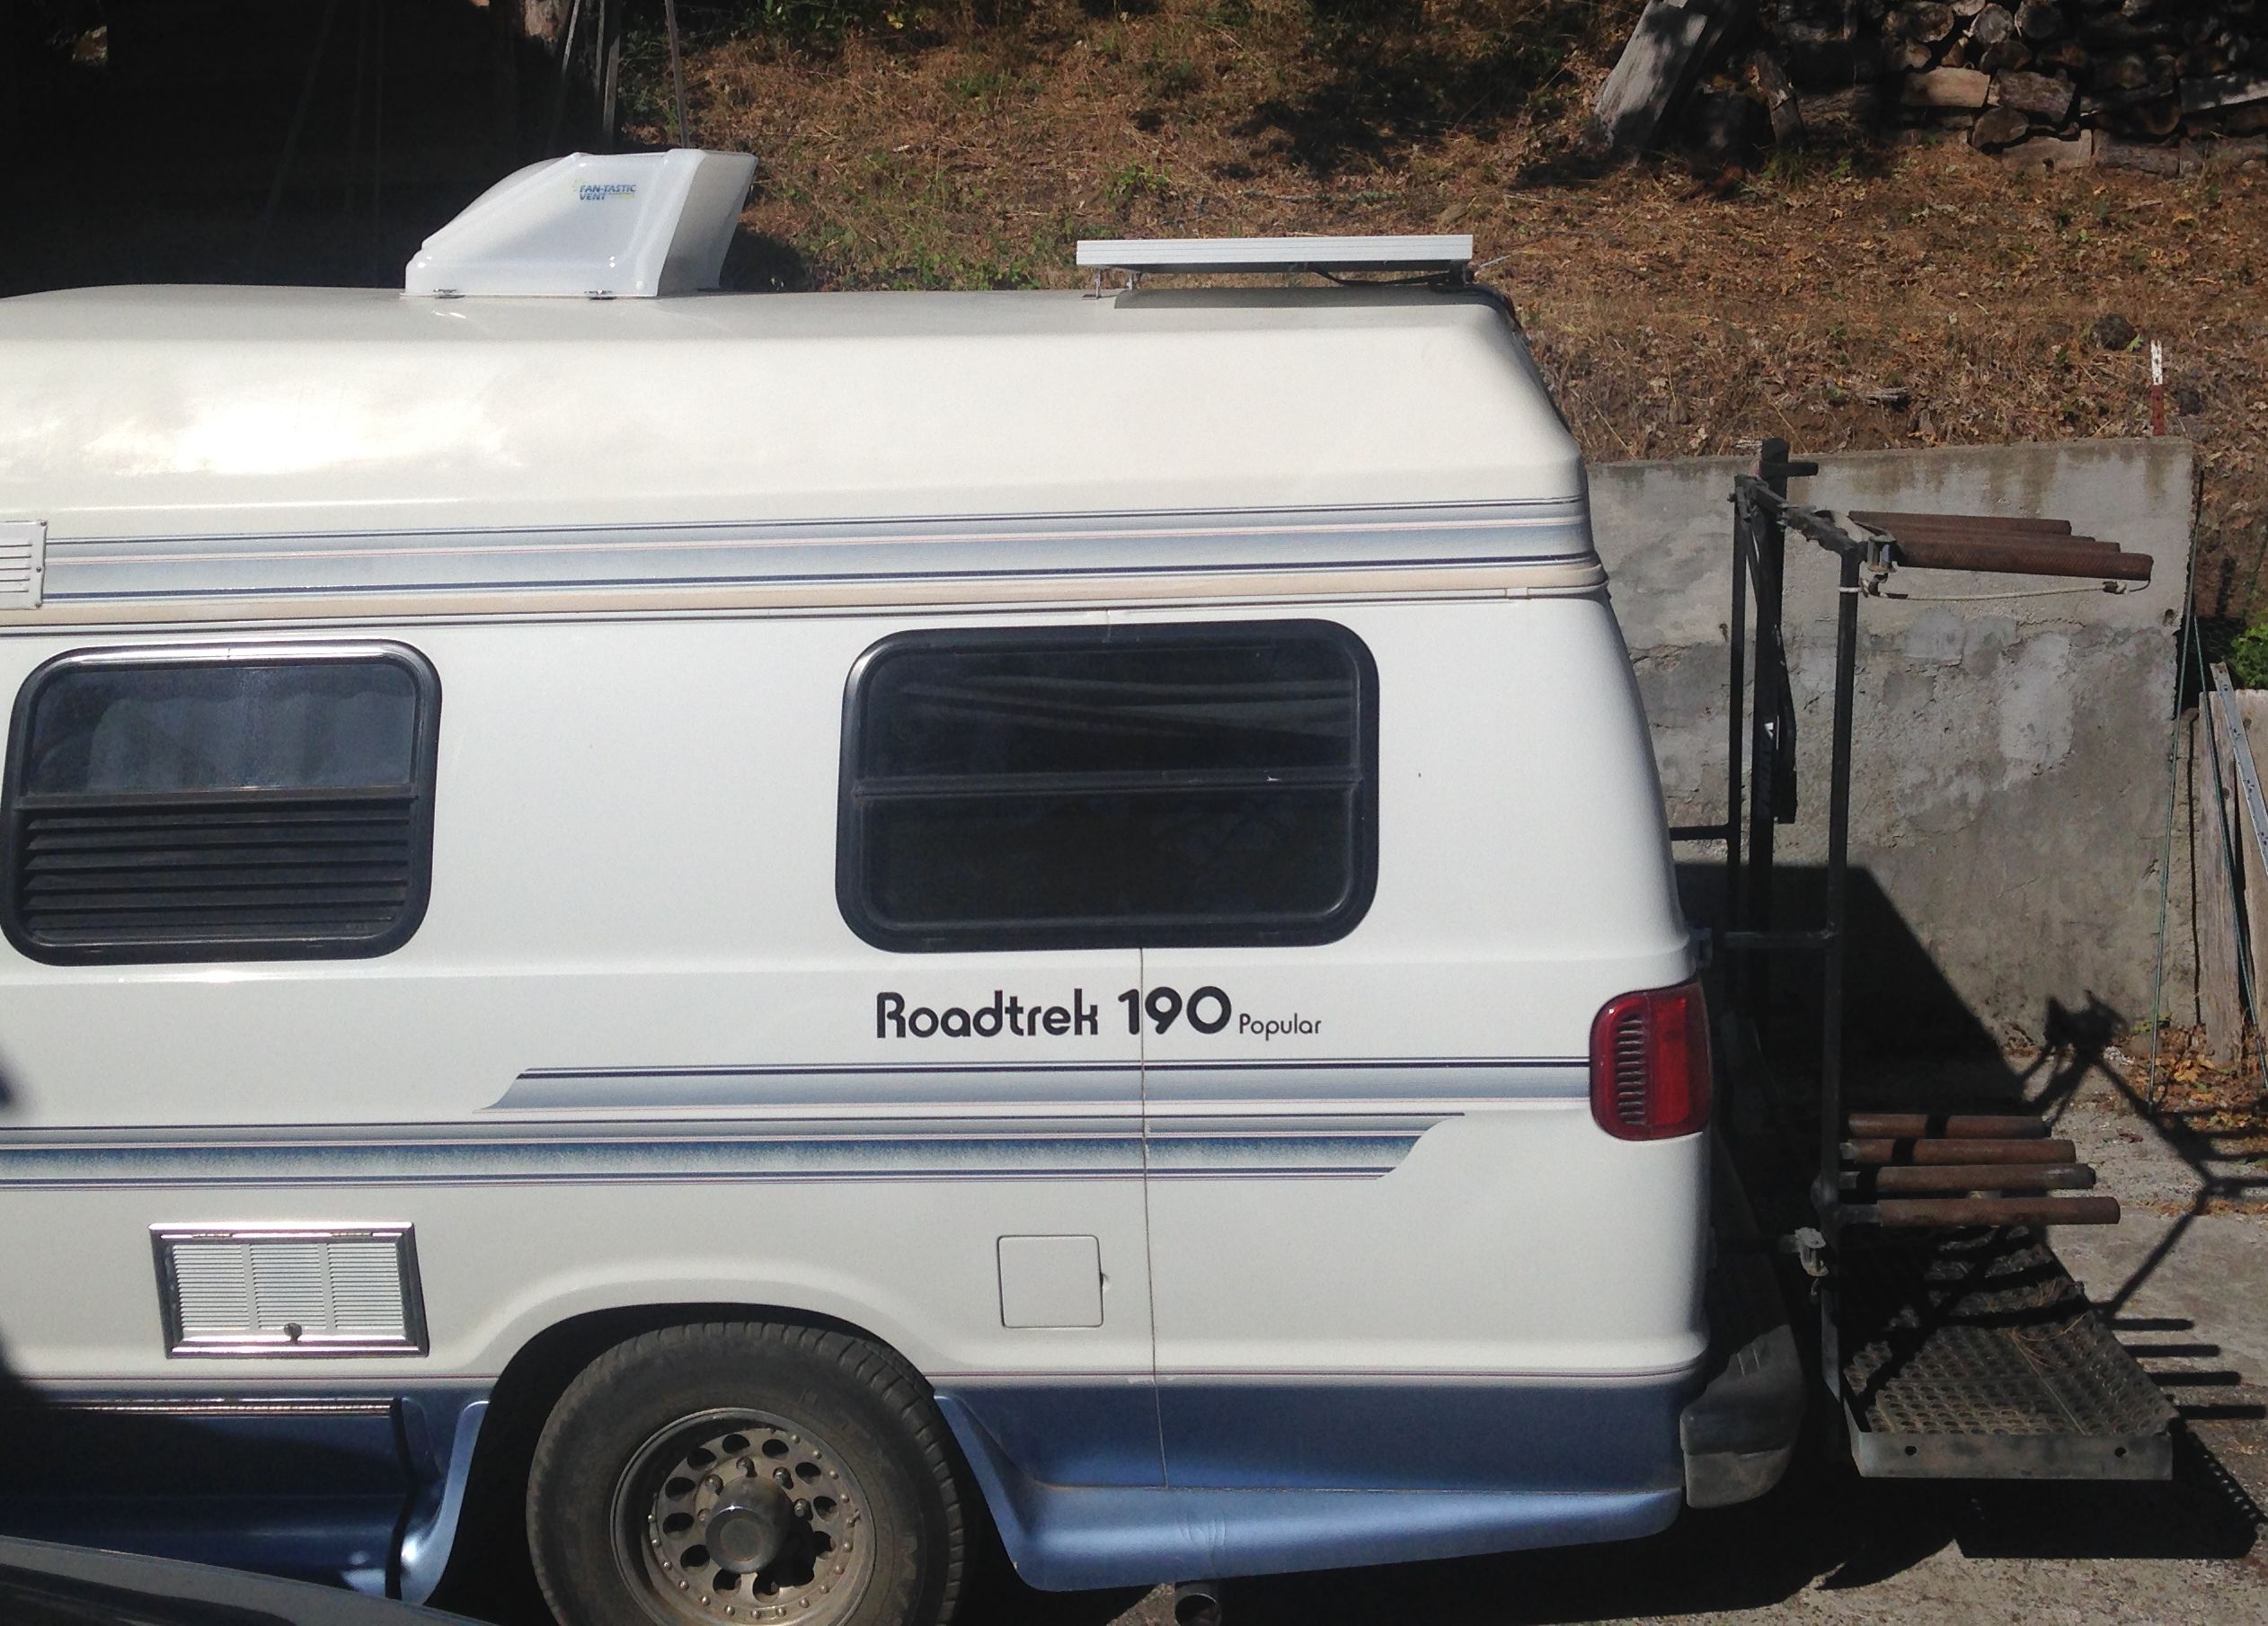
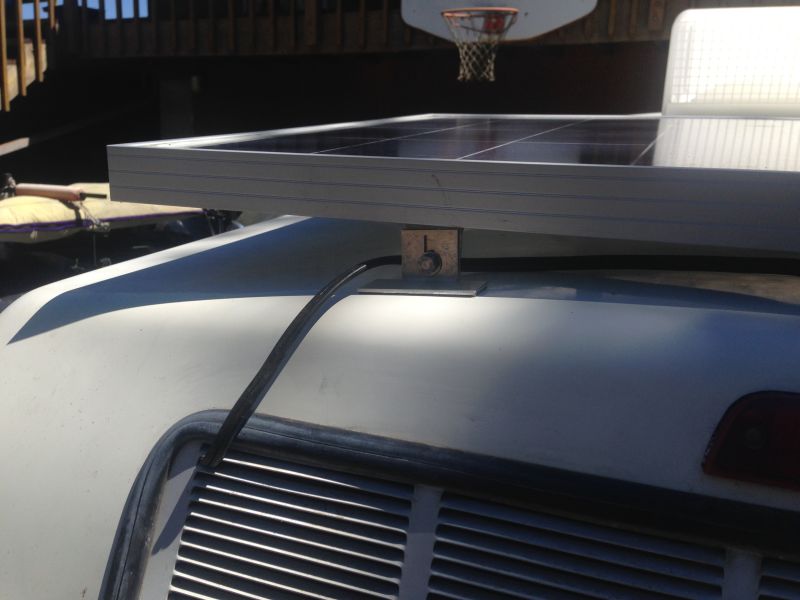
Now for an outside shot from the rear. I tied off the wires with wire ties to keep them from rubbing on the aluminum.
Here is the materials list and costs.
Sticky Feet $10.95 each and I purchased 4 for one panel
GS100 Panel $155
MC4 Connectors $1.50
Morning Star SS-10-LV controller $56
----------------------------------------------------------------------------
Total $256.30
I had the stainless steel hardware which was 4 1" X 1/4" bolts, washers and nuts.
I had the #12 wire from another job and the #10 wire was already installed.
Back