Road Trek Windsurfing Rack
During the fall of 2002 my wife and I drove to Southern Baja in our 1976
Dodge van for a month long
vacation and windsurfing trip. We had converted the old Dodge van
into a camper in 1982 and it had
served us well but it was getting old. We had so much fun that we
knew we wanted to do this type of
trip again so we started looking at Camper vans. Here is a shot of
our old van in Baja. We have 5
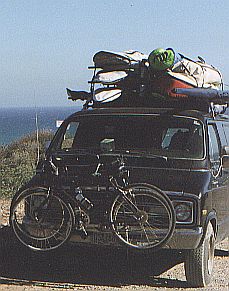 boards and enough gear for 3 sailors.
After a lot of research we found Roadtrek and decided that a 190
Popular was what we wanted.
Now came the hard part of
figuring out how to get at least enough gear for 2 people along
while modifying the Roadtrek as little as possible.
We did some looking around and found that we could purchase
a platform that connected to the receiver hitch and would support
500 pounds. We purchased one and then started modifications.
We very much wanted to use all the storage space under the bed
but we had just come through 6 drug checks getting out of Baja.
They really did not like "Converted Vans". There were too many
places where someone could hide things. It became apparent that
we would never get out of Baja without allowing the area under the bed to
be searched. We need to be able
to open the back door so that the area under the bed could be inspected..
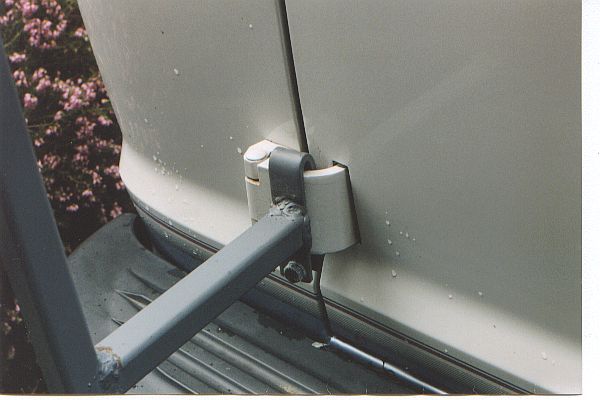
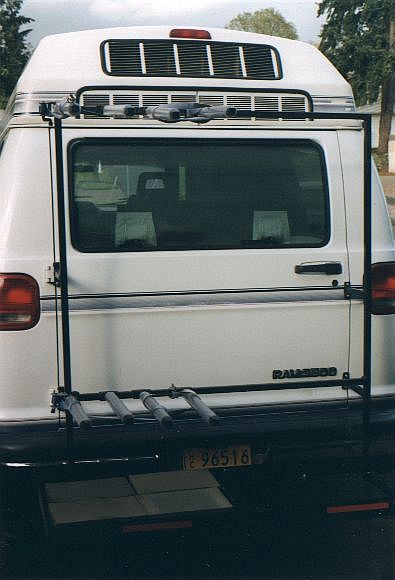
After doing some more research we found that the 1996 Dodge had external
hinges on the back door and
the spare tire rack used these. This gave us a good start. Here
are two pictures of the upper and lower rack
connection.
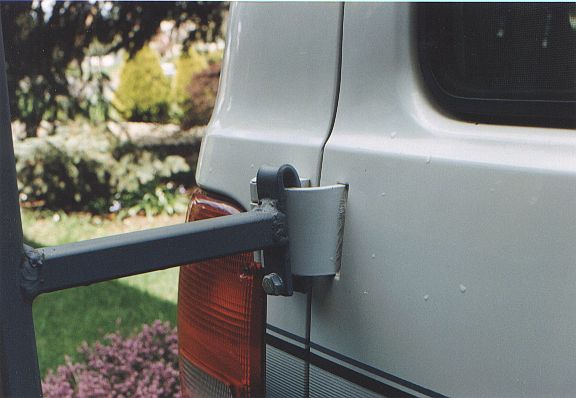
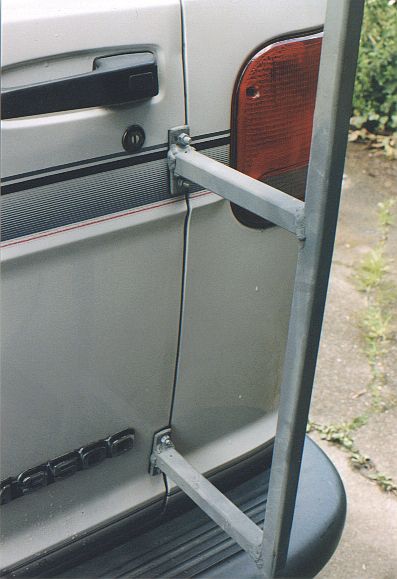
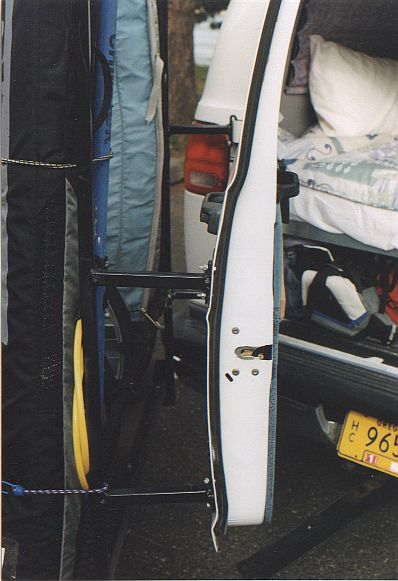
The other side of the rack was supported by the edge of the door. We
had to bore 4 holes to
mount the rack just as the spare tire rack would be mounted. There
is inner tube material between
the plate and the door. Here is a picture.
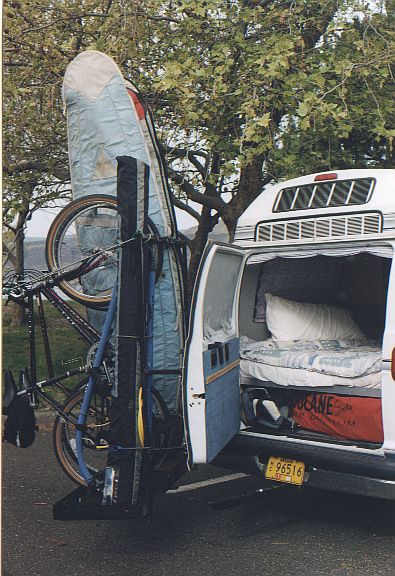
The door only supports the weight when you are stopped and the door is open.
The weight while traveling is on the hitch. Here is a completed picture.
The platform at the bottom is kind of dark in this picture but the vertical
bars on the rack
come down and extend under the platform to support the ends.

The designer of the platform had support bars which were meant to go under
the platform to support
the edges of the rack. I moved them to the inside which can be seen near
the back of the above picture.
They had to be placed inside to allow the rack to turn with the door.
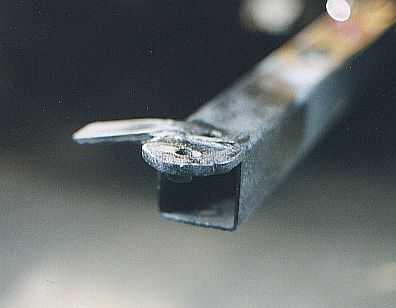
I added a 2 inch by 1/4 inch bar
that sits between the platform and the hitch bar. This supports the
center weight of the platform when
the door is open. Here is the hitch bar with an added slide plate and
a tab for a bolt to secure the
platform while driving.
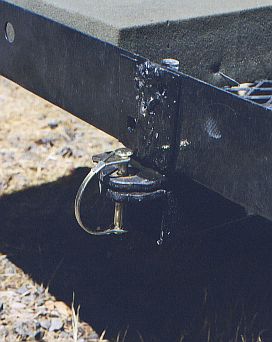
Now lets look at it assembeled. You can see the added 2 inch by 1/4
inch bar
used to hold the weight of the platform when the door is open. The
platform came in two pieces
and I had to weld them together as the bolts would conflict with the support
bars which are
now inside the platform.
Now lets look at it loaded. The total height is 10 feet.
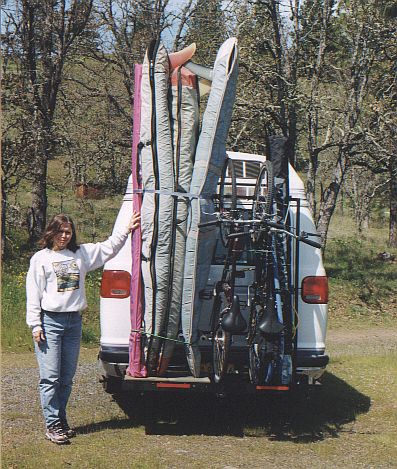
We used some modified Tule parts to connect the bikes to the rack.
The smaller sails from 2.8 meters to 5.8 meters are under the bed. A
6.3 is on the rack
as it was too large to fit under the bed. Now lets look at the rack
with the door open.
Lets look at the edge of the door where the Roadtrek had to be
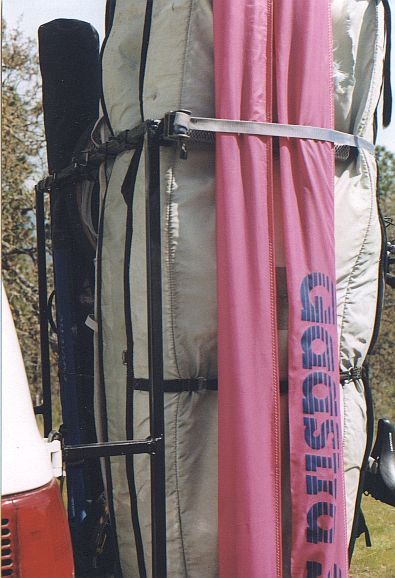
We modified the Tule crank and straps to fit the 1 inch tube that this rack
is
made out of. There are 3 two piece masts in the pink bag.
Here is what this all looked like on our first trip to the Columbia River
Gorge in Oregon.
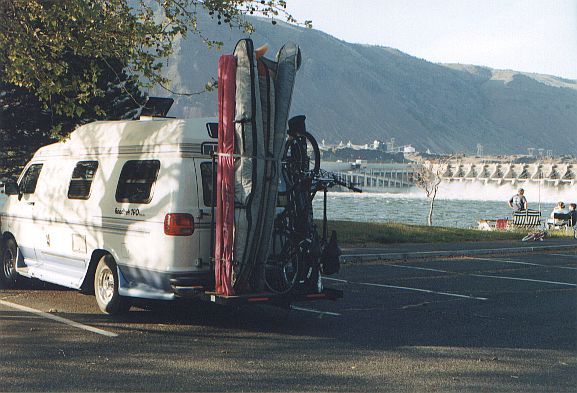
The rack took 40 feet of one inch square tubing and the 2 inch by 1/4 inch
support plate. I did all
the cutting and welding myself but there are van conversion companies that
could do this for you.
Back