Roadtrek Solar Power
on the Cheap
As solar panels come down in cost, more and more people are thinking
about adding solar capibility to their RV. There are
several reasons that solar is attractive. Many campers
dislike the noise of generators. Solar power is free once the
equipment is paid for. The total weight of a solar system is much
less than a generator. The one big negative is that a solar
system would probably not be able to run your airconditioner as it just
takes too much power.
There are a number of questions that need to be answered before a solar
system can be setup.
A. How much power do you really need?
B. How are you going to mount the system?
C. Which batteries are going to be charged?
The answer to the first question is going to depend on life
style. Each owner needs to make a list of things that they want
to power and how long they need to run that device every day. The
following table shows some of the standard loads in a Roadtrek and a
guess at how many hours they might be run. You need to make your
own table as the time each item is used will change the total a lot.
Item
Power Required
Time
Total Amp
Hours Battery
--------------------------------------------------------------------------------------------------------------
Lighting (1156 Single bulb)
1.3 Amps
3 HR
3.9
AH
Both
Lighting (Led 1156 Replacement) 0.1 Amps
3
HR
0.3 AH
Both
Lighting
(Flouresent)
1.4 Amps
????
????
House
Lighting ( Map Light)
0.27
????
????
Motor
Lighting (Map LED
Replacement) 0.0 25
Amps 3
HR
0.075
Motor
Furnace
2.5 Amps
????
????
House
Fantistic Fan
1.1/1.5/2.5
3 HR
3.3 AH
House
Hood Fan
0.8/2.2 Amps
????
????
House
Fridge
10 Amps
Propane
0
House/Propane
Microwave
90
Amps
3
Minutes
4.5
AH
Can be both
CO Detector
0.170 Amps
24 Hours
4.08 AH
House
LP Detector
0.220 Amps
24 Hours
5.28 AH
House
Water Pump
3.8
Amps
15 Minutes
0.95
AH
House
Water Heater
0.75
Amps
????
????
House
Dodge Audio
(AM/FM/Cassette)
1.5 Amps
????
????
Motor
TV
???
????
????
House
LCD(6.4
Inches)
0.6
Amps
3
HR
1.5 AH
House
VCR
1
Amp
3
HR
3 AH
House
DVD
1 AMP
????
????
House
Laptop
5 Amps
????
????
House
----------------------------------------------------------------------------------------------------------------
Total per battery
18.5 AH House Using one LED
1156 replacement
4.6 AH Motor Using one LED Map Light
Total
23 AH
The CO Detector and LP Detector are on all the time and they take 9.36
AH total. The rest of the usage is dependent on the user. In my
1996 RT six of the light fixtures take the 1156 bulbs. The map
lights and the large flouresent bulb above the bed are different.
This means you can have a much larger load if more than one light bulb
is turned on at the same time. Notice that the LED replacements
take less that 1/10 the power of the original bulbs. If you
replace all the bulbs in the van with LEDs, they can all be on and
still draw less power than a single standard bulb.
The next important question is how or where do you plan to amount your
panels? A little back ground will help here. The optimum
situation would be a panel that followed the sun across the sky.
It would have an angle that is 90 degrees to the suns rays all of the
time. Since this would be expensive, most people make
simplifications. A rule of thumb is to mount the panel at an
angle that matches your latitude. An example would be that at the
45th parallel the panel would be mounted at 45 degrees. The more
important issues is how do you follow the sun? Some people just
mount the panels in a fixed location. They then purchase 20 to
30% larger panels and do not worry about the angle. Others mount
the panels on a stand which can be moved three times per day.
This can give up to 30% more power. A second concern is shading
of the panel. If the sun goes behind a tree or even if a portion
of the panel is shadded the panel will not make its total
wattage. Most panels are a group of solar cells connected in
series. If one cell gets shaded the open circuit voltage may not
change but the solar panel will not be able to supply the rated
current thus the wattage is reduced.
Once you have an estimation of your total power usage and decided on a
mounting system, you can start to size the solar panels.
Your location will also be important. Some places in the world
get many more
hours of sunlight than others. Some people use 6 hours and
others use 8 but I believe that if you can move your panels to follow
the sun, you will get can get even more.
Using the 23 AH from the table above as an example, here is how the
calculations would be done.
Panel Wattage = (I X
E)/Hours I is the total
Amp Hours needed from the chart above. The E is the voltage
needed which will be 12 Volts. Hours are the number of hours of
good unshaded sunlight available. This calculation ignores the
fact
that some panels are rated at 12 volts and others at 14.5 for their
wattage. Since the CO and LP detectors are on all the time you
will never see a totally unloaded battery. Better vendors rate
their wattage at 14.5 volts because an unloaded battery will float up
to that level.
Here is the calculation for 6 hours of
sunlight.
(23 AH X 12 V) / 6 HR= 46 Watts
Here is the calculation for 8 hours of
sunlight.
(23 AH X 12) / 8 HR= 34.5 Watts
Here is a calculation for 6 hours of sunlight for just the CO and LP
detector. (9.36 AH X 12 V) / 6 HR = 18.72 Watts
Notice that the last column in the table above shows that RT battery
usage is from both the house and the motor battery. You have to
plan someway to charge both batteries. On first thought you might
think that connecting to the center post on the battery isolator would
charge both batteries but there is a draw from the alternator field
winding which would take up a lot of power. This is not a good
solution. I have chosen to put two sets of connectors on my
panels. One will charge the house battery and the other will
charge the motor battery. The house battery has a much larger
load so it will be charged most of the time.
Solar panel technology is moving quickly but at the time of this
writing, 5$ per watt is a good rule of thumb. If you are
purchasing very large panels the cost will be less but most RT's will
not have room for those very large panels. If you plan to let
your RV sit with the panels connected to the batteries, you need to
purchase a charge controller. This will prevent the batteries
from being overcharged. These range from $20 to $30 for small
systems.
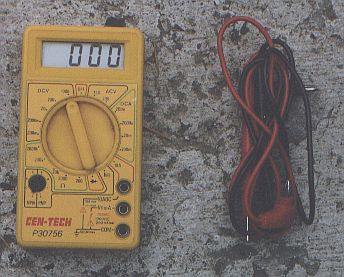
Many questions have been asked about battery preformance as well as how
to know if the battery is being charged correctly. Here are some
ideas on how to answer these questions. A good digital meter is
needed as some of the voltages you will need to measure are
small. In the past this cost a lot of money but today that has
changed. The following meter was purchased at Harbor Freight for
less than $10.
There are really two measurements that define battery
preformance. You need the voltage of the battery and it is very
nice to know how much current your solar system is putting into the
battery. The same circuitry can be used to measure the discharge
current. People often measure the open circiut voltage of a
battery and say this battery must be charged because it is sitting at
14.5 volts. A battery that has lost most of its capacity will
still pass this test. A better test is to load the battery with
about a 1 amp load and then measure the voltage. This gives a
better idea of the state of battery charge. The system I have, used a
0.01 ohm resister in series with the charging system or with the
load. This means that you will read 0.01 volts per amp.
You can also put the meter in DC current mode and measure
the current directly. Normally this works fine for a one time
measurement but if you want to monitor usage in an on going
fashion, the shunt reistor is a better option.
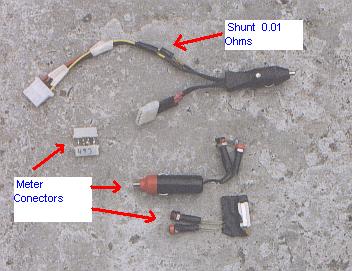
Since I have done a lot of work on PC's in the past I have chosen to
use connectors that have been cut off defective PC equipment. I
have
also chosen to use the standard auto connectors also. This allows
me
charge any auto sytem as well as charge other items that I have setup.
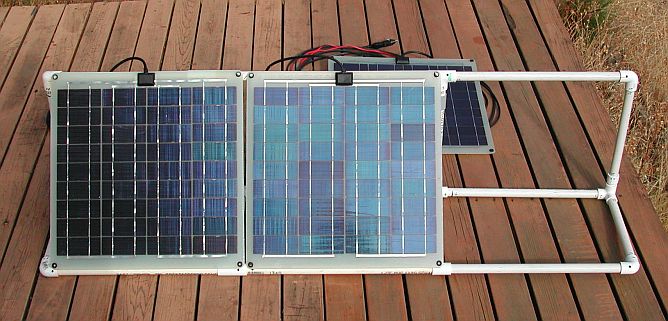
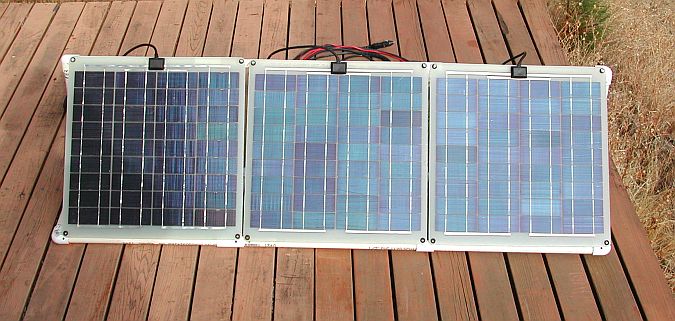
What follows are some pictures of a set of panels which would
probably be considered as a minimum for an RT. Three 20 Watt
panels were purchased on ebay for a total of $300. This is
exactly 5$ per watt. These are the newer type that are circuit
board based and they came without any frame or glass cover.
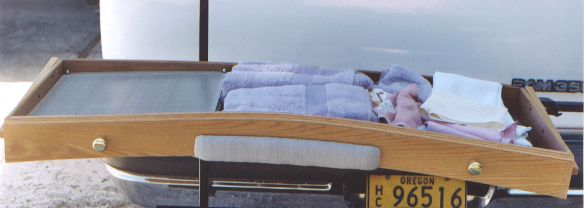
The panels are then bolted together for storage.
The panels are stored in the drawer which is over the front seats.
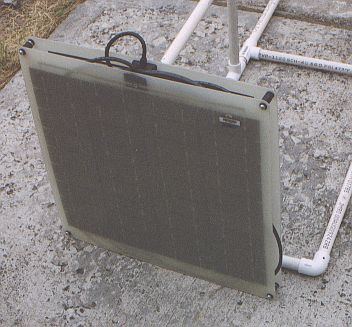
Since this type of panel comes without any rack, I made one from
PVC. This takes one special fitting which is shown in the
following picture.
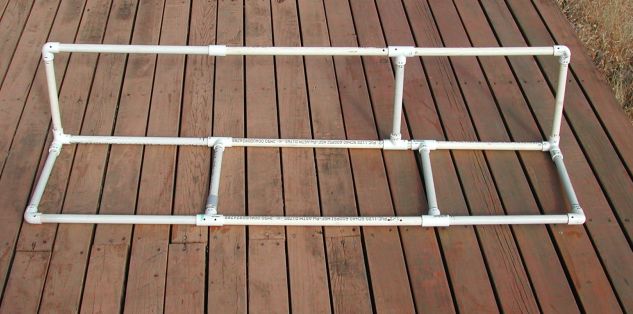
Here is a picture of the three panels mounted in the PVC rack. The
panels are mounted to the rack by drilling a hole through the PVC in
the corners. The rack is not glued so it comes apart for storage.
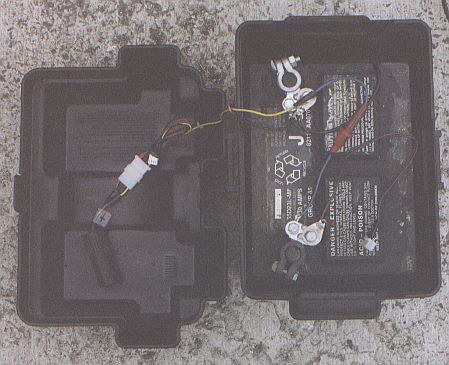
On my last trip I took an extra battery along. This was an old
standard car battery that had allready lost most of its capacity.
The interesting thing about this battery is the box as it can be moved
around for use in a remote location from the RV. It can be taken
to the beach or a picnic table. We used this battery to power a
600 watt inverter which provided 120 volts for tools and things that
needed power at remote locations. Notice that it is also fused so
some simple mistake does not burn things up.
(
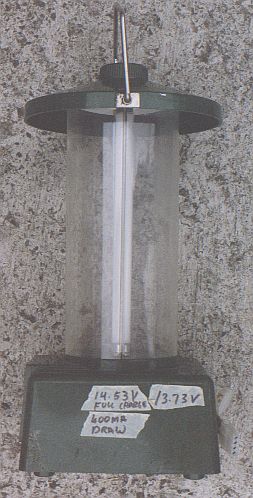
A friend gave me an old floursent light that ran off a 12 volt lantern
battery. It had been left in the bottom of a boat until the
battery had leaked and ruined much of the inside of light.
I cleaned out the mess and installed some "D" size nicads that I had
laying around. This pack was fused just to protect in case of a
short. I fully charged the pack and then measured the voltage with one
panel connected and in float mode. This was then marked on the
outside of the box so that a simple volt meter reading would allow the
state of charge to be tested.
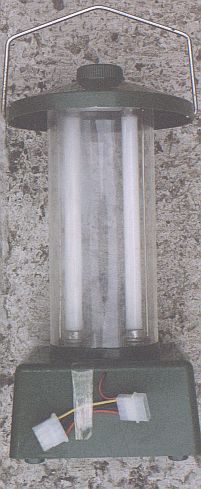
I then added PC connectors, so this can be setup in a feed through
mode. We used this to light up our lawn chair area in the
evenings. We found that you could use this for about 9 hours
between charges. Some information on the internet has shown that
floresent lights are actually more efficient per lumen of light output
when compared to LED lighting. This may well be true but
floresent lights work well when lighting up a large areas where all
this light can be used. LED lighting works best in smaller areas
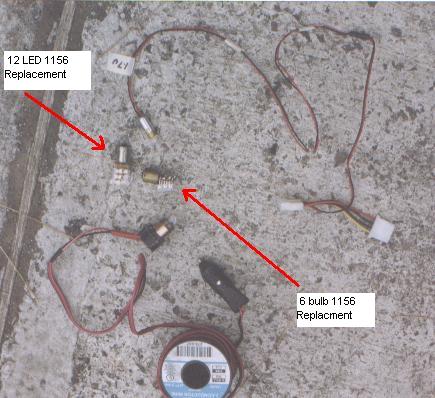
where the light needs to be more focused. Here is a pucture of
the LED 1156 replacement along with some other lights that we used for
different purposes.
Here is a picture of the LEDs, as they were purchased, that were used
to create
it.
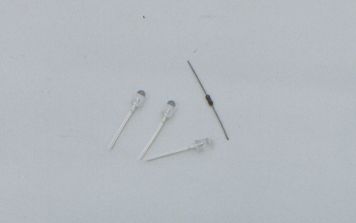
Most parts outlets sell these LEDs for lots of money. These
were purchased off Ebay in lots of 100. They were offered for
less than 40 cents each.
For more information on building LED lights, please see the following page:
Roadtrek_tips
Back