Roadtrek Tips - LED Lighting
LED Lighting
During a month stay in Baja where there was no electricity, I
decided that LED
lighting would be the way to go. Upon my return I located LEDs with
a brightness
of 5000 MCD, on Ebay for much less than I could purchase them any where
locally.
These new bright white LEDs have different voltage and current
requirements than
in the past. They have a drop of about 3.3 volts and an
active current of about 20ma.
Recently they have moved up to 40,000 MCD. As part of this change they are now driving
the parts to about 25ma. The resister must change for the new drive current. If you are
going to size your own resistor you need to know several things. The first being the voltage
that an alternator can reach when the battery is almost charged. This value is around 14.6
volts. You also need to know the voltage drop across the LEDs. This appears to be between
3.2 and 3.3 volts.
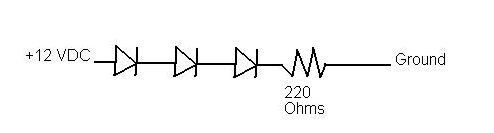
My first shot was to replace the map lights in the front of my Dodge.
Here is a drawing of the circuit.
Here is what a set of parts would look like before they are soldered down
onto a board.
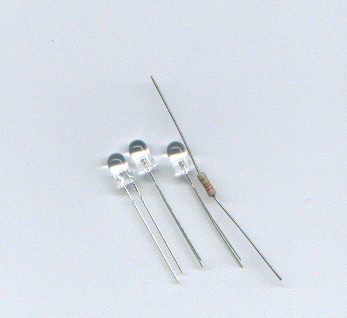
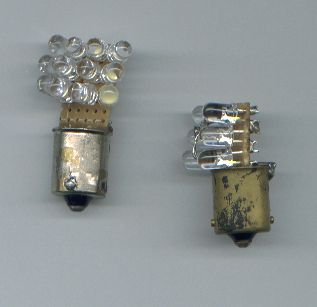
Here is a picture of the bulb I replaced and the LED light. I
started with some FR4 circuit
board that had an edge connector fingers on it. Three of the fingers
were the same width as
the bulb. I soldered a bare wire on each of the outside fingers to
make it thicker. This came to
about the same thickness as the base of the bulb. The new light has
about a 10 degree
radius of light so it is quite directional. I like this as it keeps
the light out of the drivers eyes
when the passenger is reading.
The power required is about 1/15 of the original bulb.
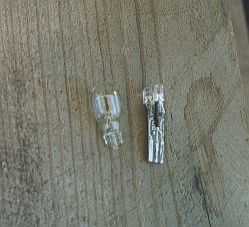
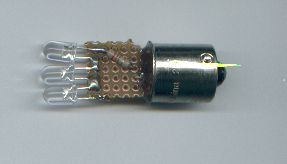
Here is my next try at a replacment.
This picture shows another piece of circiut board with
predrilled holes which had 6 LEDs mounted on it.
The circuit is the
same as above just doubled. I placed the circiut board into the base
of a burned
out bulb and connected the plus 12 to the center pin and
the ground to the outside.
The circuit board was then slide into
the base and the base was filled with fiberglass resin.
This light
is again quite directional
so make sure the little pins on the base are alligned correctly for
the way you want
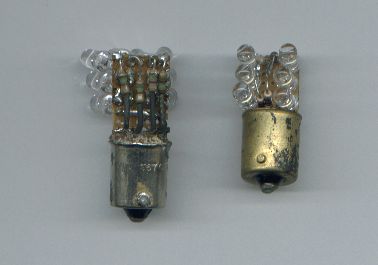
the light to shine when finished. My next light had 12 LEDs on it.
With 12 LEDs you are
approaching the brightness of the original bulb but the light is not in 360
degrees. The original
bulb draws 1.29 amps and this circiut draws about 80 ma. Again you
get about a 15 times power savings.
The following shows an LED light created to send the light beam directly out
in line with the base.
This is what is needed for the outside light on a RT.
When I started this project the bulbs were just starting to show up on the
internet. It looked like
each one would cost about $20 to $25. My 12 LED model cost me about
$3.60.
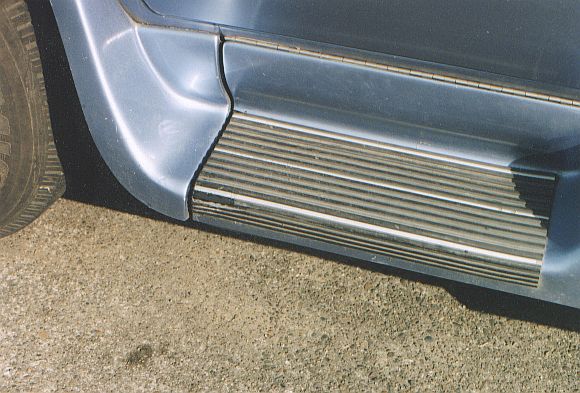
Step Repair
Roadtreks that were built around 1996 seem to have a problem with
the drivers side front step
cracking. When we got ours it looked bad. The front edge of the
step was separated about
1/2 inch from the tread of the step. After close inspection, I found
that the verticle edge of the
first step was too long and was taking all the weight. This made it
crack the step. I took about
1/8 inch off the edge of the step and then added a piece of oak for the step
to rest on when it is
closed. This took the pressure off the edge and I was able to glass
it back together.
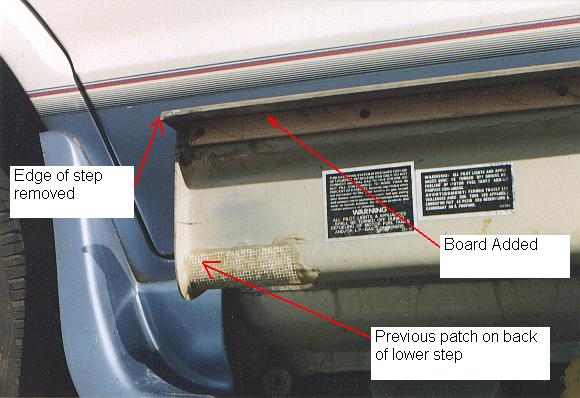
I did not take a before picture so all you get is what it looks like after.
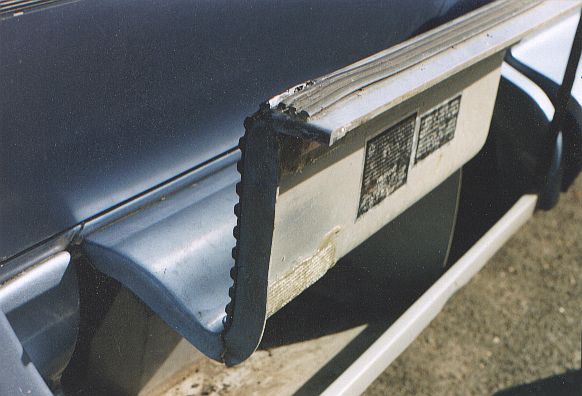
Some of the black tread was missing so I built it up with fiberglass
and then filed it back to look like
the original rubber. A little black paint helped it a little more.
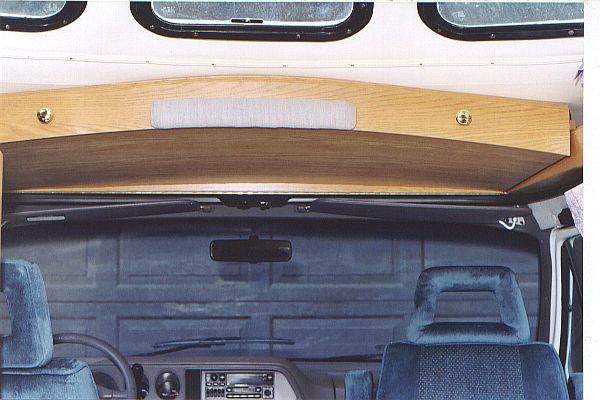
Drawer
There have been questions about the Dodge drawer over the drivers seat just
about everytime I talk
with Chevy owners. The last ones I talked with wanted me to remove
the drawer and photograph it.
I decided to just post those photos so Chevy owner can see what they are
missing.
Here it is sitting out in the open. This is where I store three 20 Watt
solar panels.
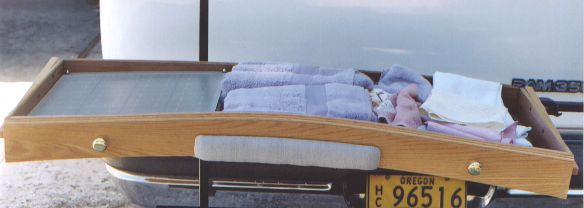
The three solar panels are on the left side and they are facing each other.
I take them out and set them
up in a rack when we are boondocking.
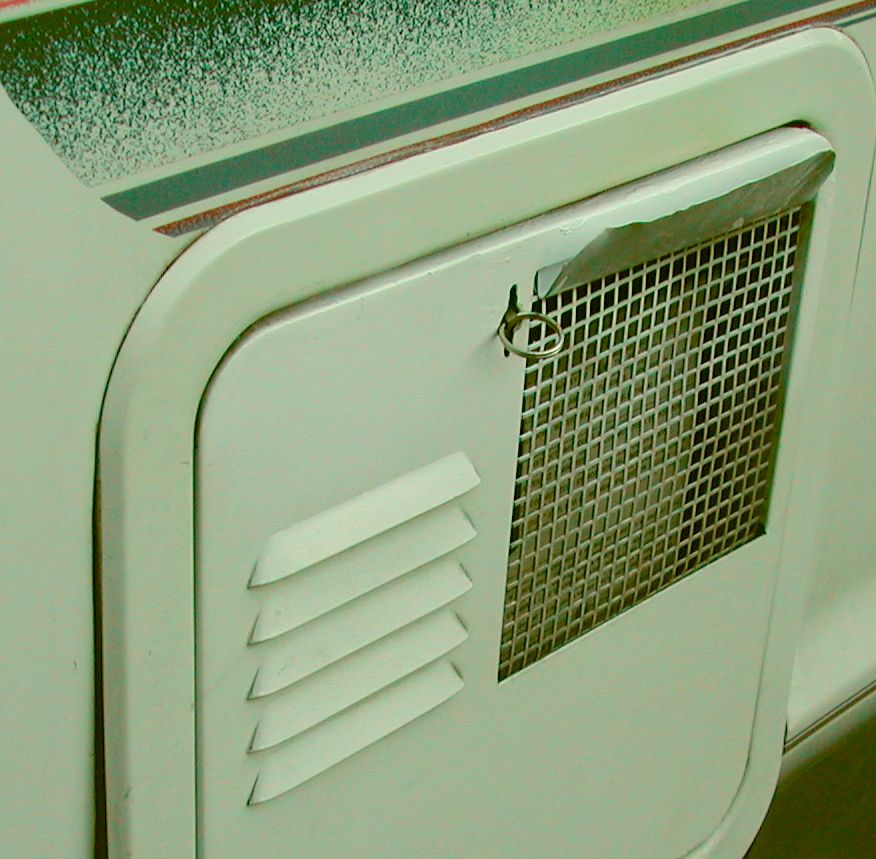
The 1996 RT has a problem with the vent from the water heater. If you use it a lot, soot turns the paint black
above the water heater. This can be fixed by adding a deflector which causes the soot to gather on the
defelector but not on the paint. My fist try was done with tin foil but it had to be removed while driving.
The screen in the door can be removed and a deflector made from a piece ofsheet metal. The screen can then
be pop rivited to the deflector. I painted mine white which makes it less noticable but you could paint it
black. This would reduce cleaning. Here is a picture of what it looks like when done.
Back