Extending Wifi Range by Adding an Antenna
Wifi is very shortly going
to be the way that most people access the internet. As I write
this, Portland Oregon has just approved a plan to completly cover the city with
a low speed wifi. Wifi is a low power radio signal that connects to your
laptop or client. There are many things that can get in the way and cut the
signal. Things like metal or living things like trees or bushes act as a
short. This means the signal will go to ground and not to your receiver.
The real problem comes when people want to use wifi in something like an RV
which has all metal sides. The signals cannot get in or out except
through a window. Things like windows, plastic, fiberglass, and dry wood
will cut down the signal some, but usually you can get through them okay.
There are several options for improving the signal that gets to your
receiver. You can move next to a window, or you can use some form of a
radio, that can be moved to a better location. You can also add an antenna
to some radios which will give you a much better signal.
The first issue is understanding where the signal is coming from. If you
pull into a camp and have no idea where the acess point (AP) is located, a wifi
sniffer can help a lot. The access point is sending out a signal which
says "I am here and my name is XXXX" where XXXX stands for the
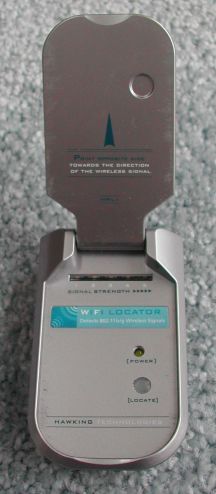
SSID. Some will give you the SSID and others such as this Hawking
Technology will give you the signal strength and direction but not the
SSID. It looks very much like a cell phone.
Another way to track down an access point is by using some free software
on your laptop. This software works with most wifi cards but not
all. Since the software is free, give it a try, as it is VERY useful in
understanding what you are looking at. The URL is as follows:
http://www.netstumbler.com
When you start this software it will show you all the access points with in
range. A lock will show up by the ones that use some form of
security. If you are connecting to one of the locked access points then
you need an access key which is a bunch of letters and numbers. This must
be entered into your wifi radio software so that you can connect.
You can use this software to find an access point by moving your laptop around
and watching the signal strength on the display. To get the appropiate
display you must click on the plus by SSID and then click on the access point
you wish to monitor.
So now you have found a signal but you need to increase the signal. There
are many choices. Lets start with the easiest solution and work to some
better solutions. When we were in Baja last Christmas, the camp wifi only
covered about half of the spaces. People who ended up in one of the
spaces with a weak signal were told to purchase a Linksys WUSB11. This
device can be connected to a laptop with about a 6 foot USB cable. You
can open a window and hang it outside the RV on the side of the RV where your
wifi sniffer told you the signal was coming from. Here is a picture of
the Linksys device. That is a nickel in the foreground for size.
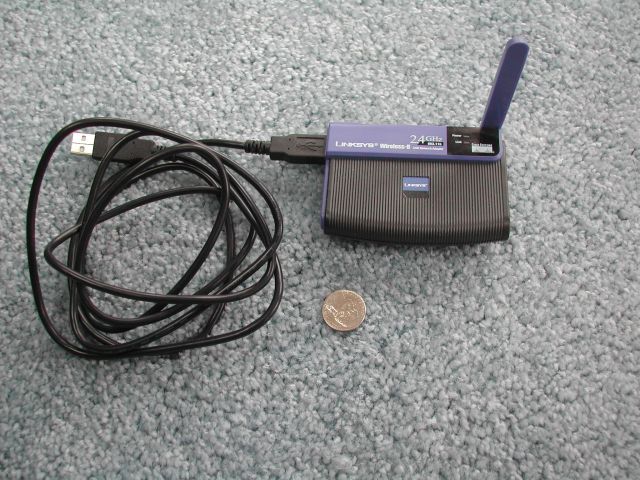
The antenna on this device probably gives you about 2 or 3 db more gain which
is not much. By allowing you to hang it out a window you gain much more
because the metal on the sides of your RV is no longer blocking the signal.
The next step up, is to add a PCMCIA radio. The card that most of the
original wifi people liked was a Orinoco Gold. This card was purchased by
Dell and remarked a Dell 1150. It is no longer in production but both
cards can often be found on Ebay. There are two reasons this card is
special. It has an external antenna jack and it has one of the best
receive sensitivity specs on the markent. Both are important. There
are othr companies that make cards with the external antenna jack but they will
not be the cheapest cards. The jack adds about $5 to the manufacturing
cost of the card.
A typical setup of a PCMCIA card and two cables will run less than $60.
The connector for the external antenna is on the end of the card. The
jack is quite small and fragile. Here is a picture of the card and a two
different length cables purchased off Ebay.
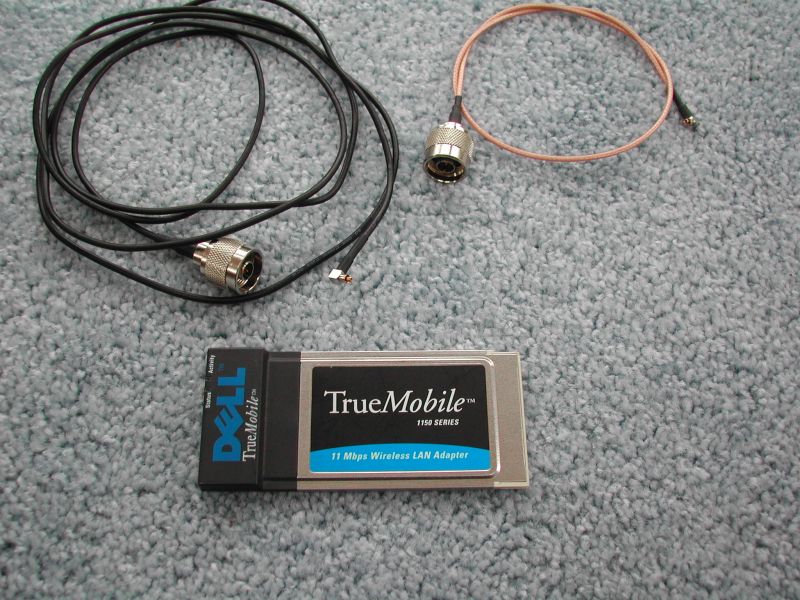
The black cable is 6 feet long and I used it when my antenna needs to be
outside. The copper looking cable is 18 inches and is used when the
signal is very weak. You get some signal loss in the cable so a shorter
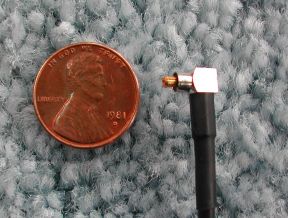
cable gets you more signal. The card end connector is quite small.
Here is a picture next to a penny to show its size:
The connector on the other end of the cable is called an "N"
connector. It is the standard connector found on many purchased antenna.
You can purchase many different wifi antenna but I choose to make my own in
most cases, as it is quite simple. As can be seen by looking at the
pictures in the rest of this page, I have built a lot of antennas. The
antenna I like the best is called a "Can Antenna". It is just a
tin can with a "N" connector added and a piece of #12 guage wire cut to
the right length. Here are some pictures:
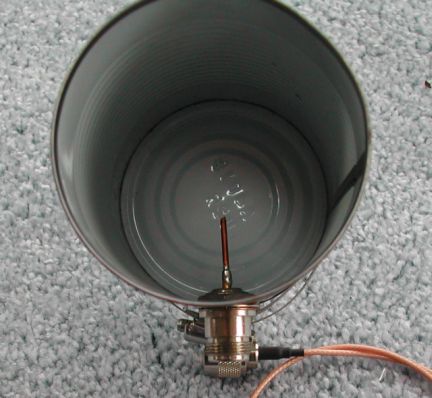
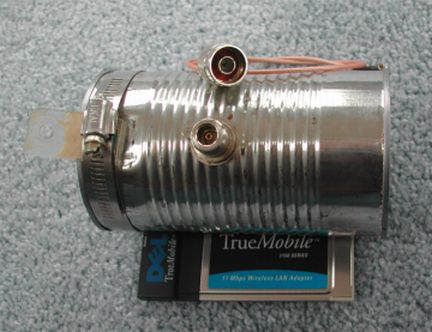
This antenna is made from a soup can that is about 3.25 inches across.
The "N" connector is placed 2.5 inches from the rear of the
can. If you have a different size can, there are calculators on the
internet that take the diameter and tell you the location for the
connector. The copper wire inside the can should stick up 1.2 inches from
the edge of the can. The thing I like about this antenna is, if you are
off a little bit, it does not kill the preformance. This can should get
from 10 to 12db of gain.
This setup will get you at least a 1/4 mile from the AP and will probably do
more like a half a mile if the AP has a good antenna.
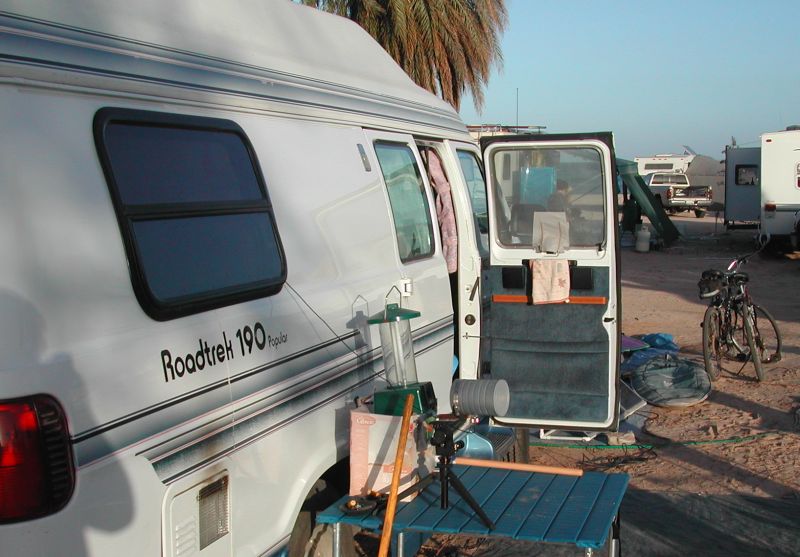
Last year the computer was on the bed and the wire ran out through the
window. The can was on a tripod which sat on the blue table.
<>
The following year we placed the can on the roof over the drivers seat and used
small plastic sacks of sand to hold it in place We put the computer on
the fold out table so you could sit in the captians chair to run it. That
was more comfortable.
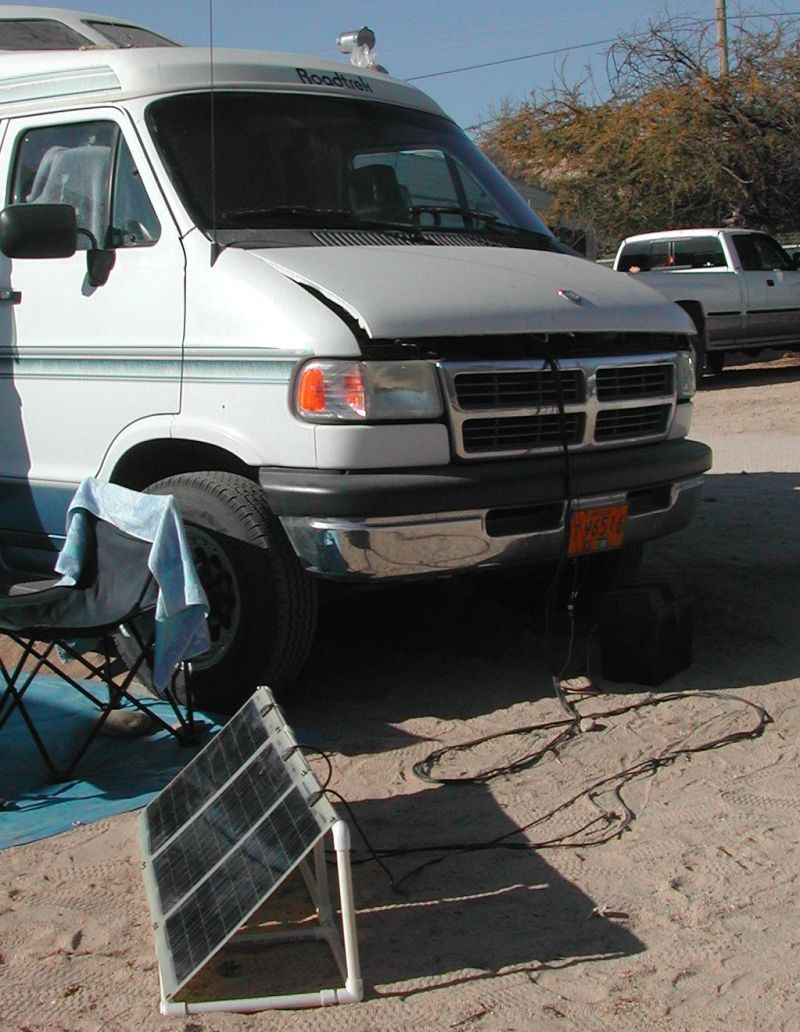
We were using 60 watts of solar panels to power our laptop, LED lights and
entertainment system.
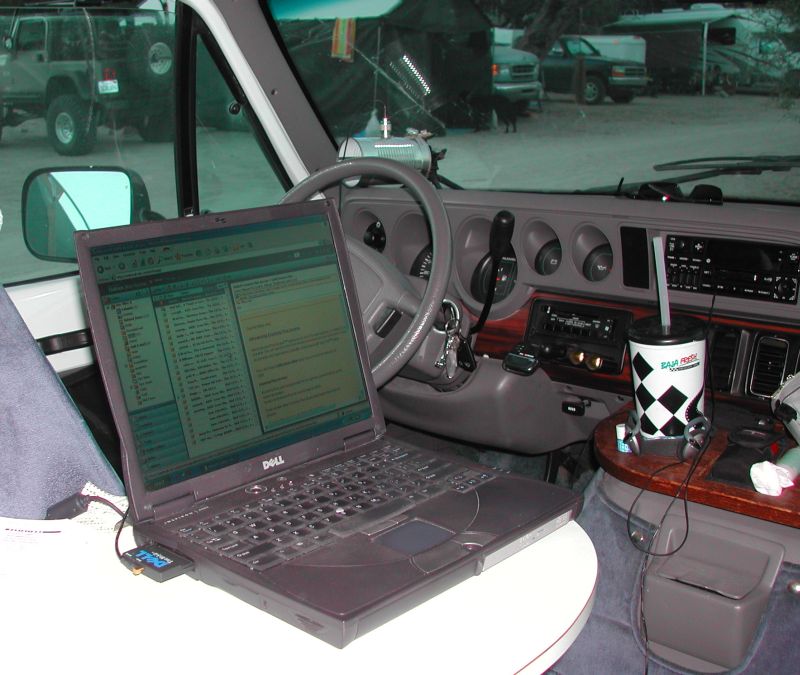
Here is the view of the inside with the computer on the table. Notice
that the can antenna is sitting in the window. I always try getting it to
work from inside before moving the antenna outside.