Antenna Testing
This web page shows a number of home made and purchased antenna that I have
tested. The equipment for doing this testing is described in Extending Wifi
Range using an Antenna The software used is Netstumbler. There
were two different access points used. The access points for the can
antenna was 2 miles away and the access point for the dishes was 5.6 miles
away. The two different access points were needed because the dishes have
a lot greater gain than the cans.
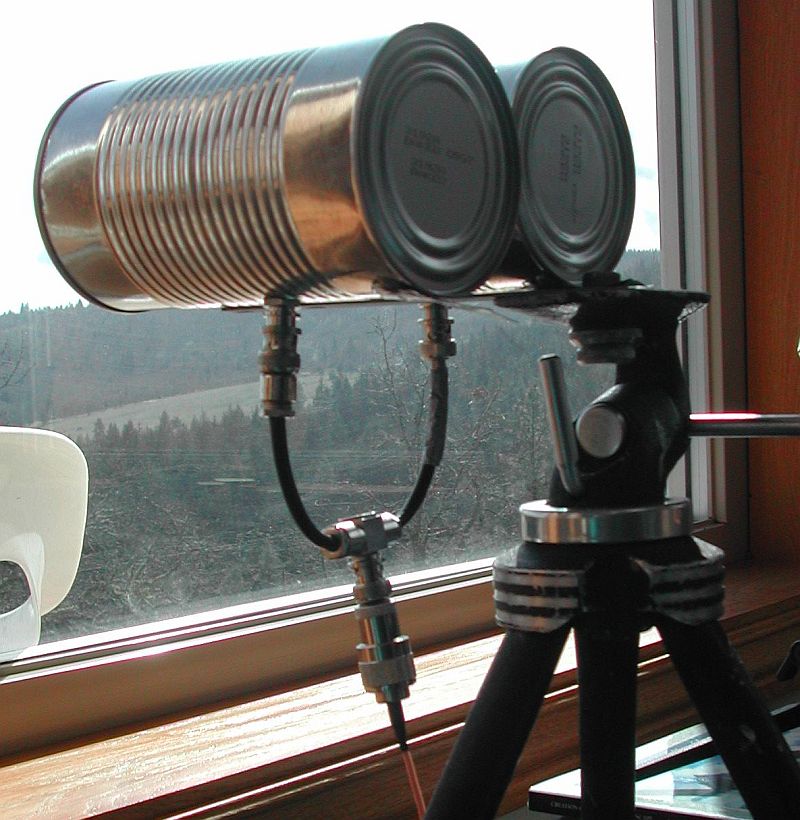
The first one is just two can
antenna in a shotgun setup. The connectors for this setup would probably
cost more than it is worth but it does improve performance. It might add
as much as 3db.
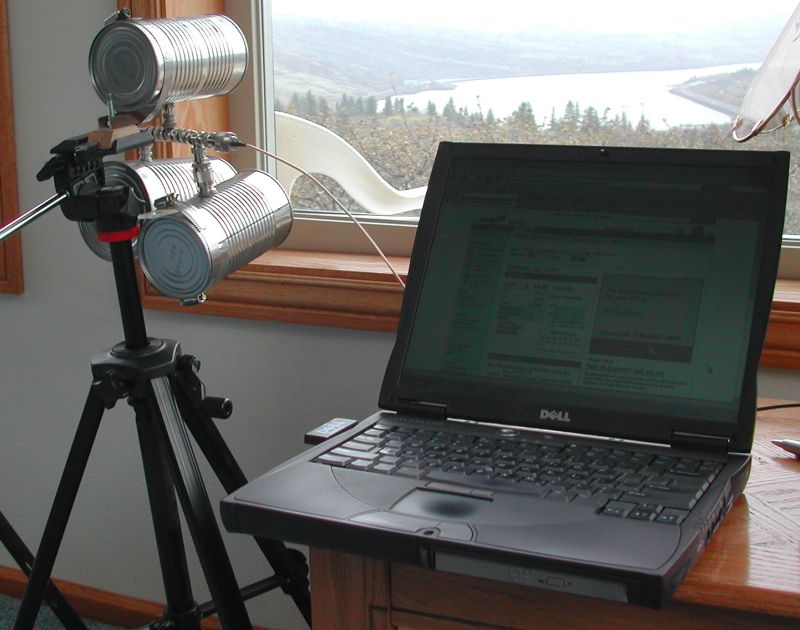
If two are good then three must be better. I do not think you get 3db for
every one you add but it does improve a little. Since db is a log
scale, 3 db increase would be double the power level.
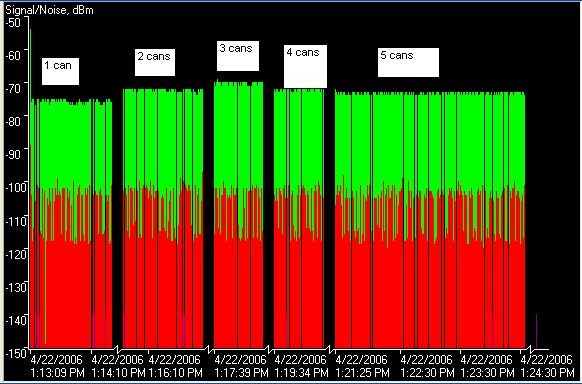
I actually kept increasing this to 5 cans just to see what would happen.
Three seemed to be the best and after that it started to drop off. An
open stub made things much worse so all inputs need to be connected. The
source was a Netgear home style router connected to an antenna about 2 miles
away. Here is what that looks like.
The hardware connecting these cans is not optimum. BNC connectors are
really only good to about 500 MHZ. Using a splitter rather than a Y would
also make a big improvement. This is what I had to play with and it worked but
could be improved on.
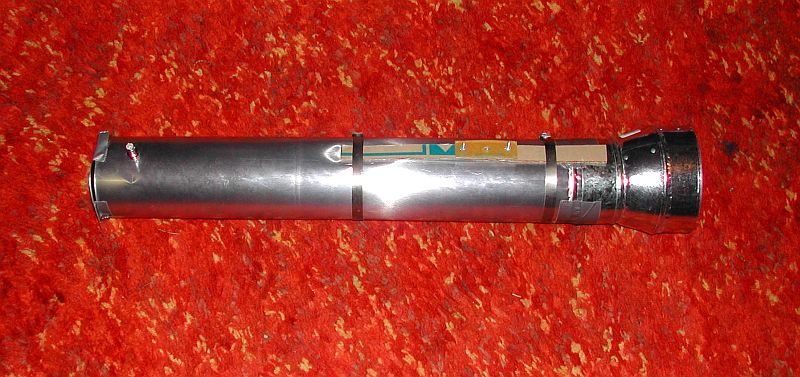
Some people feel that long cans work better. I did see a little increase
but not nearly as much as the shotgun cans above. This is made out of
dryer duct.
Here is another variation,
which does use a can that is of the optimum size. It is 4 inches in diameter and over 6 inches long.
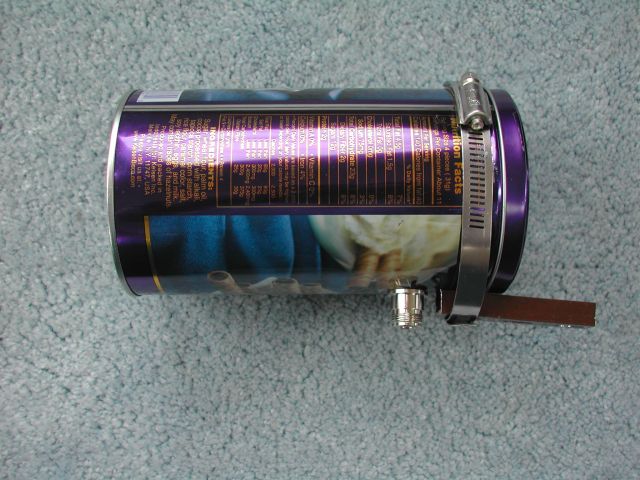
Now lets take a look at the
same can with a funnel on the end.

Here are the Netstumbler
plots for these two options.

The funnel adds about 2 db.
The following is another 4
inch diameter can but it is shorter.

Here is a 3.5 inch diameter
can. Now lets compare them to
the can above with the funnel.

Here is the Netstumbler plot
for these 3 cans.

The can with the funnel is
very similar to the much smaller 4 inch can. The 3.5 inch can
Did not do so well.
Some people like parabolic dishes and
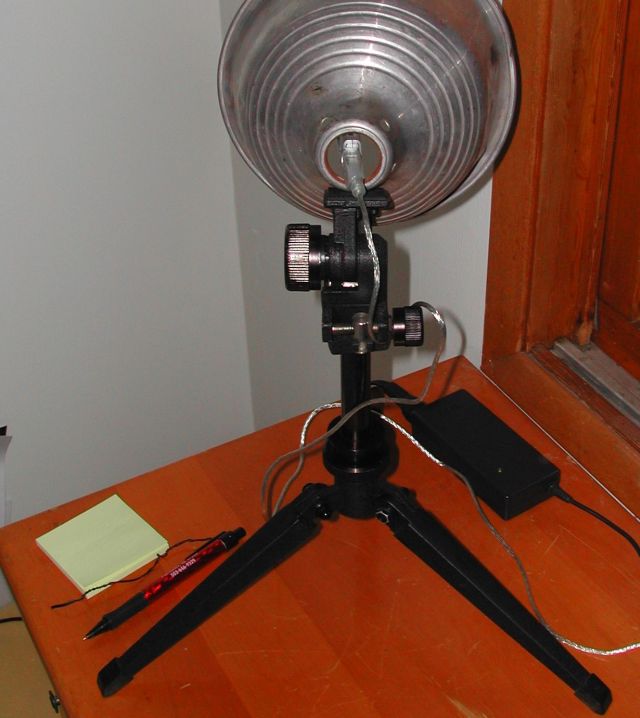
I decided to try and put one in a can. It worked but not very well.
Part of the problem is that you need to know exactly where the antenna is
inside the plastic case. It then needs to be mounted at the correct point
inside the can. The standard can antenna was much easier to build and get
a good one the first time.
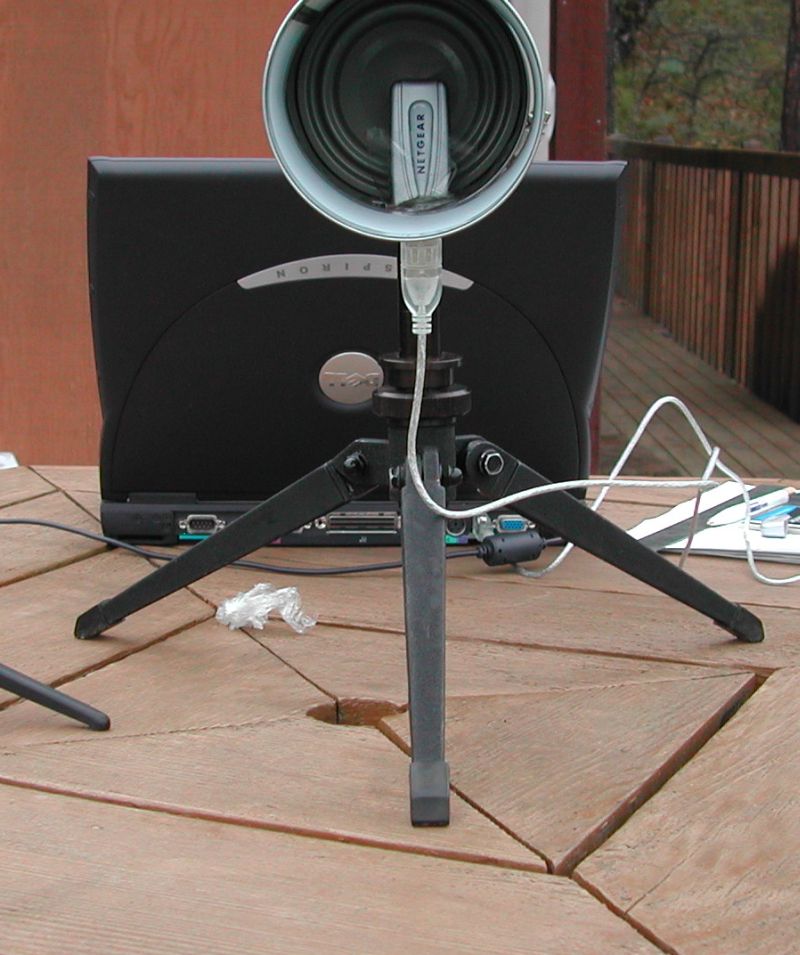
Here is a view of a test bench that I setup to compare the different antenna I
have built. I use a distant AP and switch between antenna using
Netstumbler to do the comparison.

Now for a real antenna. If you had two of these and they faced each
other, you could probably do 8 to 10 miles. It has a gain of about 18 to
20 db.
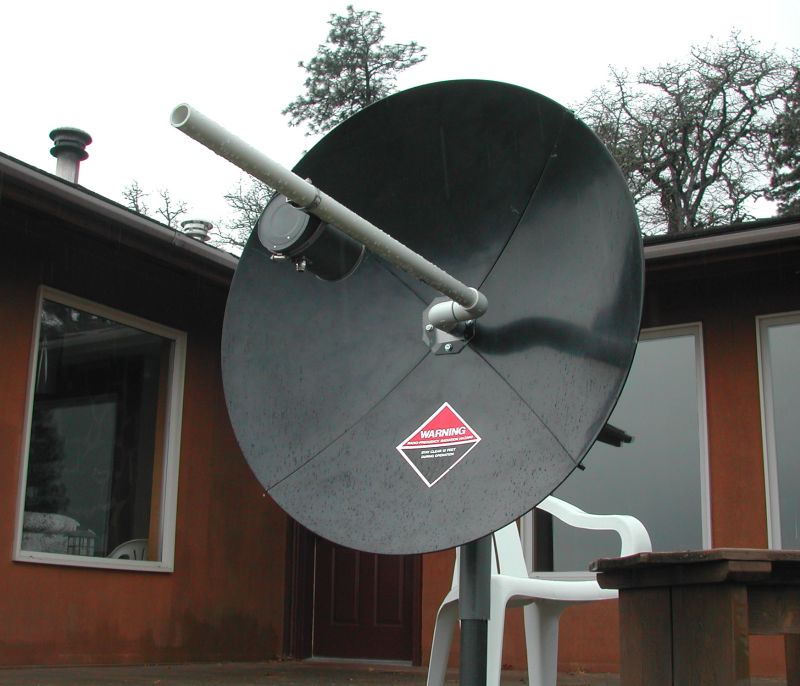
The warning label states that no one should get close than 12 feet.
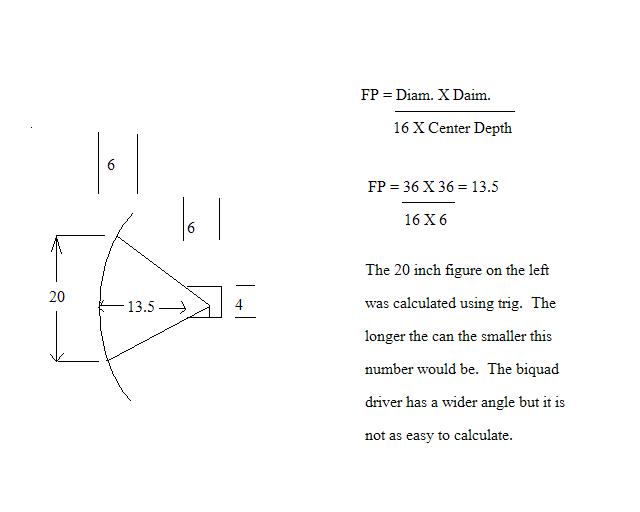
Notice that this dish uses a can antenna for the driver. This
is not optimum as it only drives about 20 inches of a 36 inch diameter dish. This assumes a 4 inch diameter can that is 6 inches long. Here is a diagram that shows how the edges of the can block the outside edge of the dish.
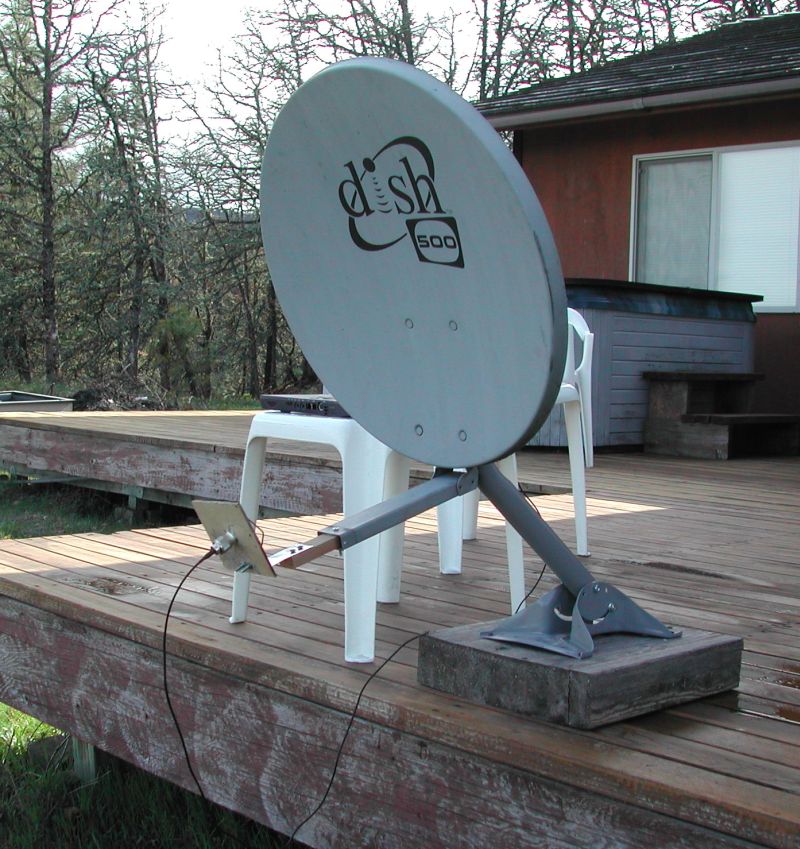
Here is another dish that uses a biquad driver. This dish is what is
called an off center type which means the feed horn is not in line with the
signal. This makes it much harder to point. This dish came with a
double feed horn for connecting to two satellites. That makes it less
sensitive to vertical position because the dish is much taller than it is
wide. I had hoped this would do much better than the dish above but it
was really about the same. The biquad driver could be improved by adding 4 pieces of circuit board around the edges.
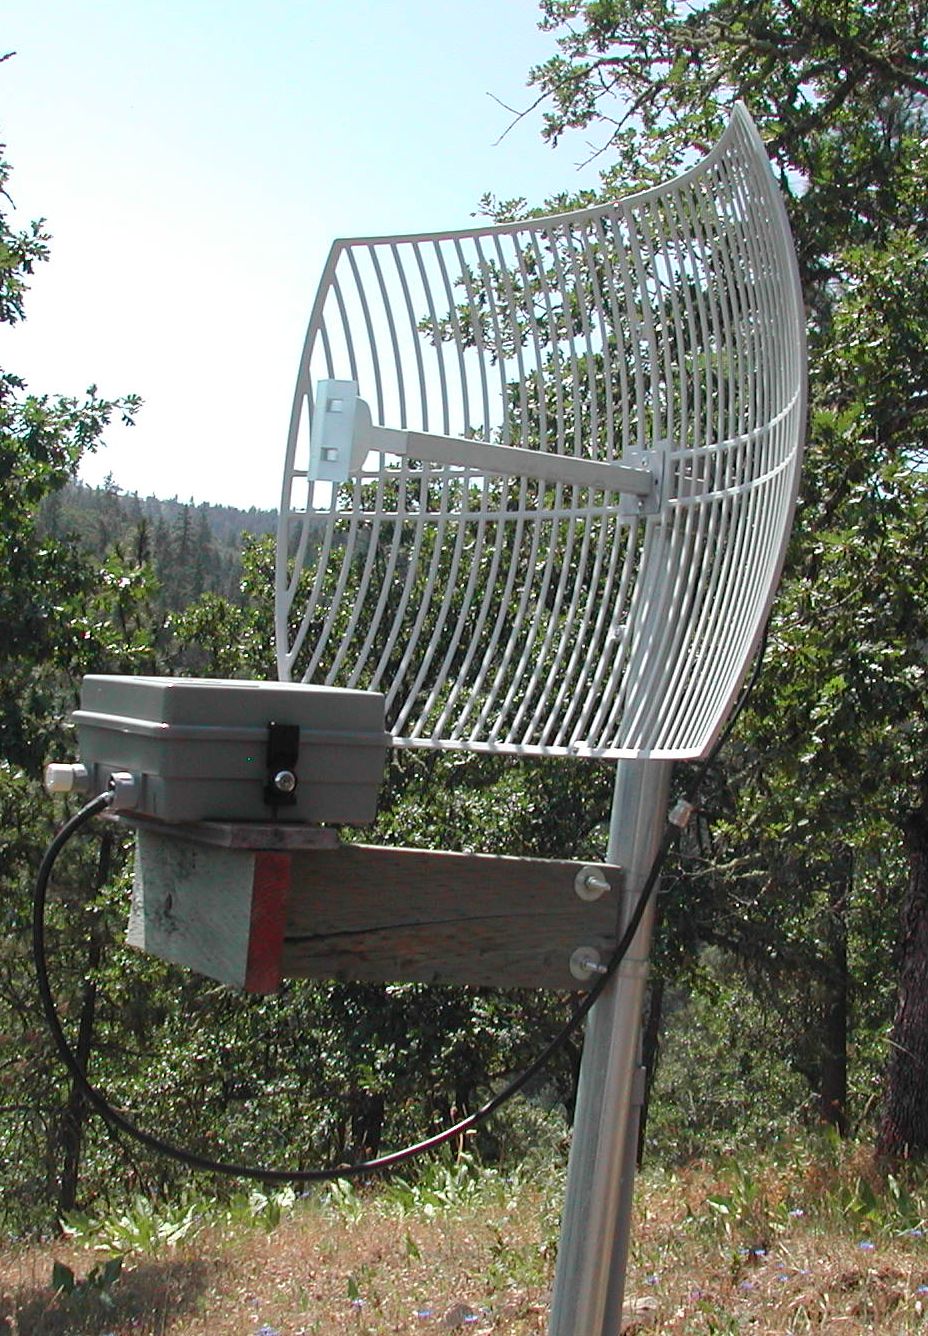
High gain grid antenna can be purchased for less than $50 and probably work
better than these dish antenna but you sure learn a lot more by building your
own. Here is a picture of a 24DB Pacific Wireless grid antenna. It has about 5 or 6 db better signal levels than the dishs shown above.
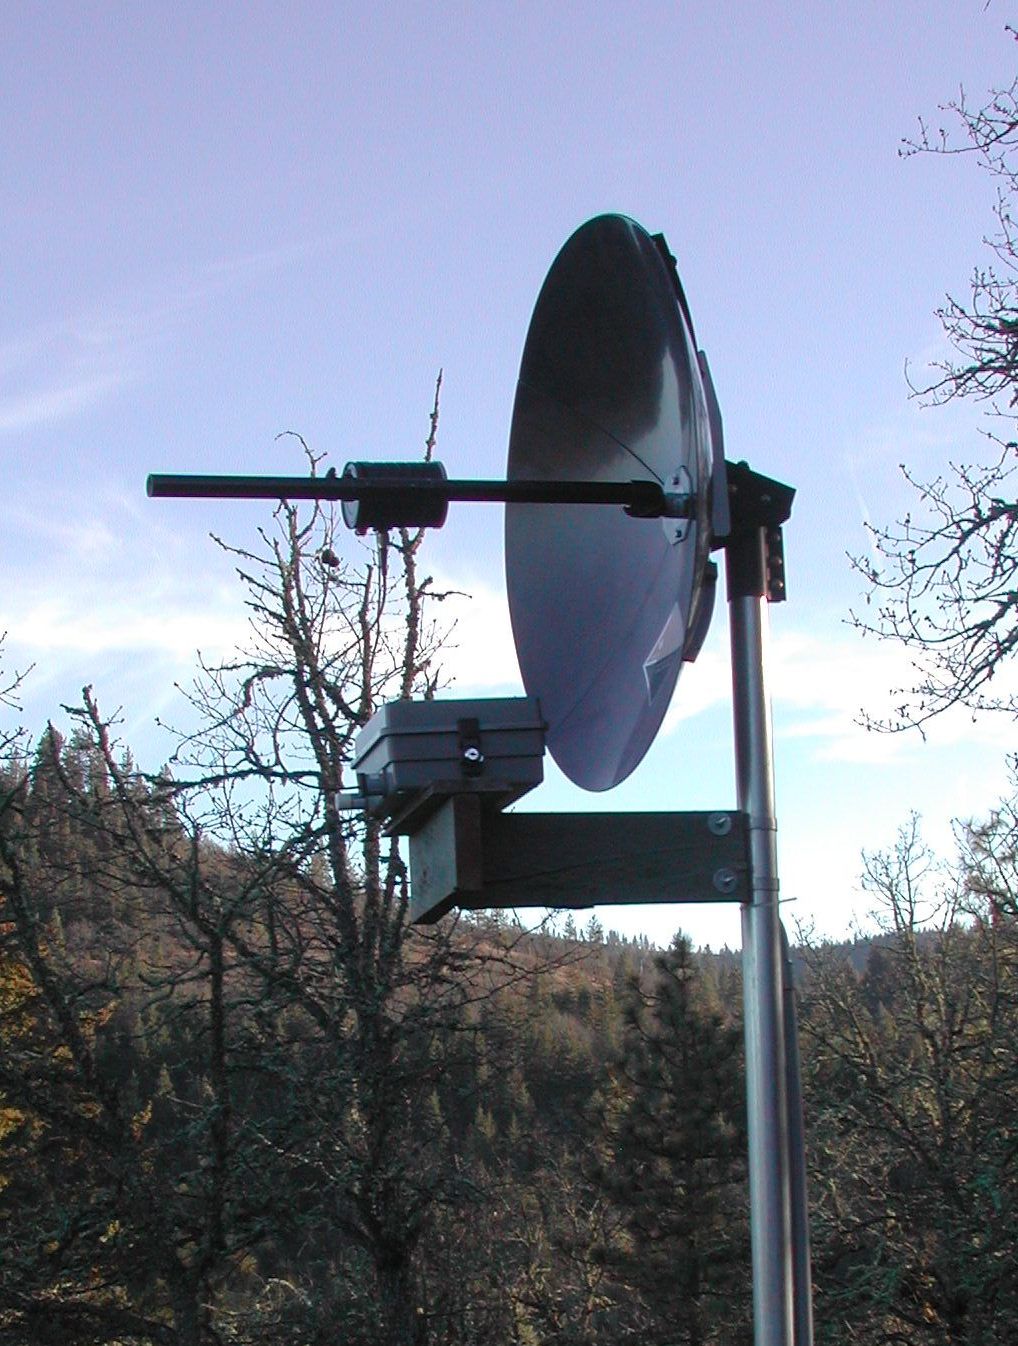
One of the problems related to setting up any outside antenna is cable
length. There are two ways around the problem. The first way is to
mount the receiver in a weather proof box near the dish. The advantage is
the short cable needed from the antenna to the receiver. You loose very
little signal. One of the problems with this solution is the need for
power at the dish for the receiver. If you choose to use something like a
WRT54GL (running custom software) as your receiver, you can then do power over
Ethernet which uses some of the extra lines in cat5 cable to provide power to
the router. Be careful as there are two standard for power over Ethernet
and they put power on opposite lines in the cable. In case you are interested
in the custom software, check out http://www.linksysinfo.org. Look in the
forums section under WRT54G and DD-WRT. Lets look at a picture:
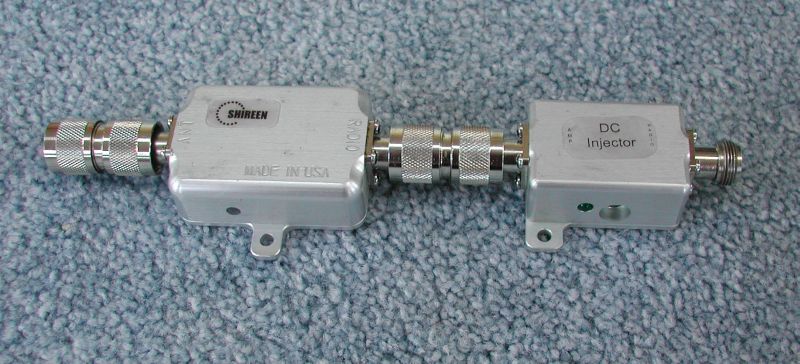
The second solution for the cable problem is to add an amplifier. You can
then run very long lines without a problem. A DC injector is used
to put power on the cable. Normally a 9 volt power supply would be connected to
the DC Injector. Here is a picture of a 1 watt amplifier which is the
largest that can be used outside the military.
The issue with this solution is cost. The amp and injector cost about
$260. The second issue is that some antenna seem to have a lot of noise
when amplified this much.
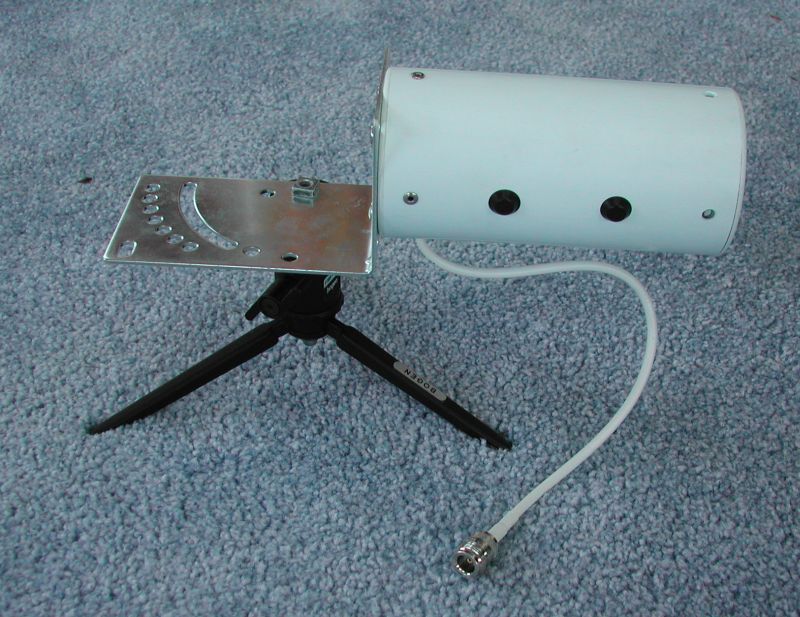
As a test, I borrowed 4 commercial antenna and tested them with and with out
the amplifier. The results are interesting. Lets start with the
smallest one and go to the largest one. Here is a picture of a 9dbi
HG2409Y made by HyperLink Technologies.
Here is a plot from Netstumbler first with out and then with the amplifier. The
source is a commercial WISP that is 5.6 miles away. They are using a
AirPointPro transmitter which includes its own antenna.
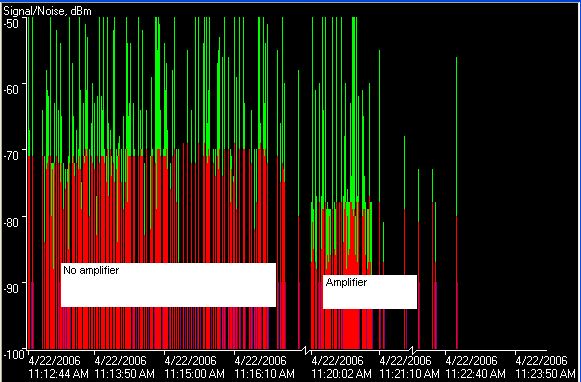
This antenna appears to have lots of noise and that causes the amplifier to not
help much. It also seems to miss a lot of data. I have no idea what
the term for this would be but I have heard it called picket fencing.
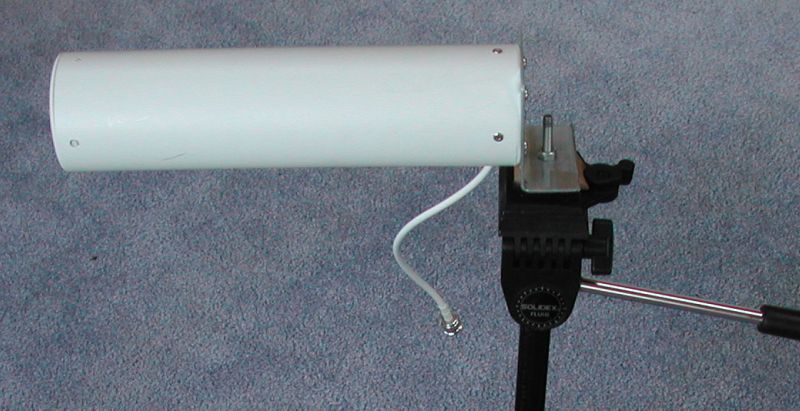
Now lets look at the same data for a 12dbi antenna made by the same
company. It is model HG2412Y. First a picture:
Now for some NetStumbler data.
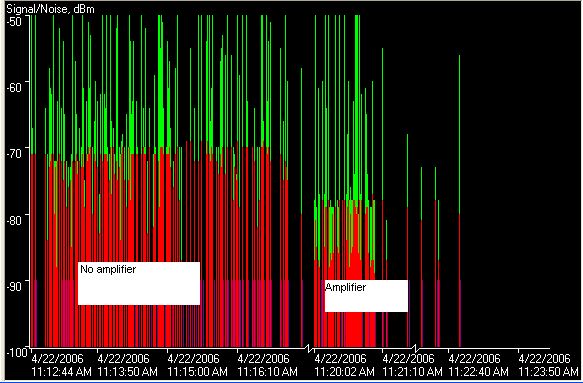
Again adding the amplifier may have reduced the noise some but it did not do
exactly what we wanted.
Now lets look at the Casigrain dish. First a picture:
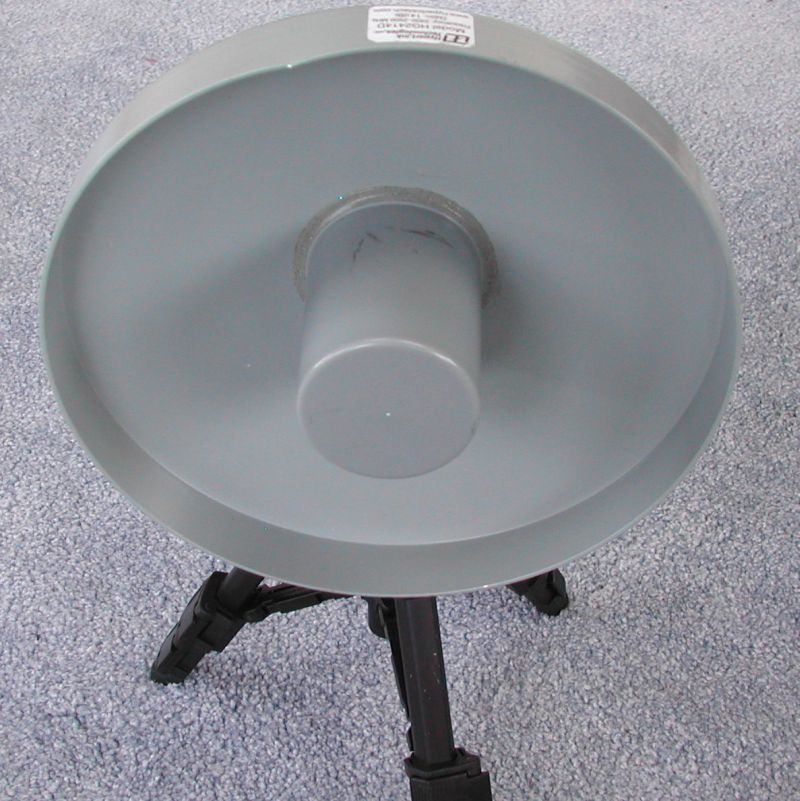
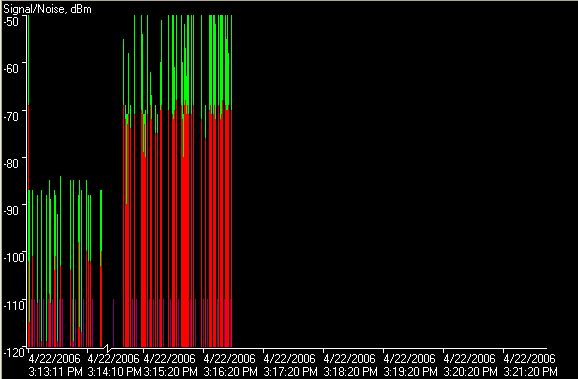
Now lets look at the NetStumbler data. The lower portion has no amplifier
and the higher portion includes the amplifier. The noise increased a lot
but so did the signal. This is more like what I would have expected.
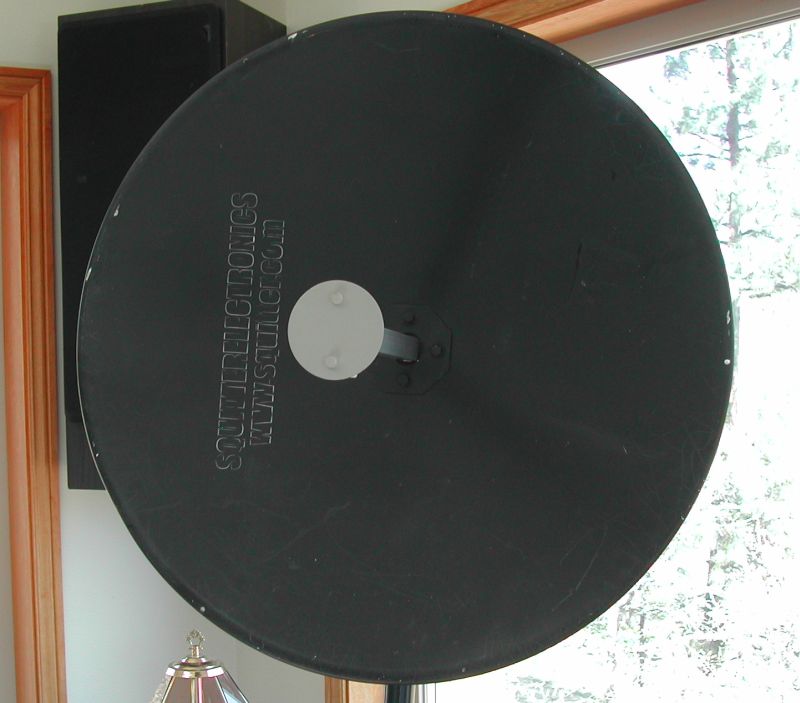
So a small dish was good, let’s look at a big dish. This is a commercial
25dbi dish.
Here is the NetStumbler data. Again this looks more like what I would
expect. The noise and the signal both get amplified.
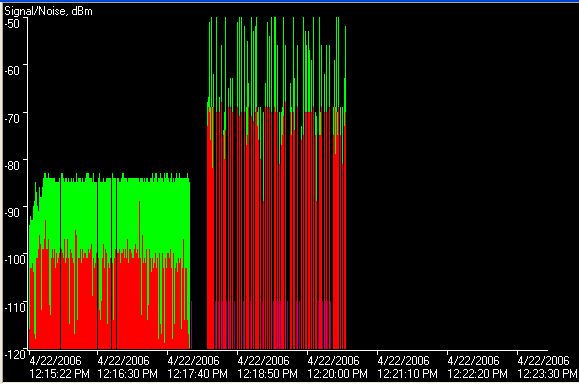
Now just for comparison, I will include the NetStumbler data from the dish 500
with the home made biquad driver which was pictured above.
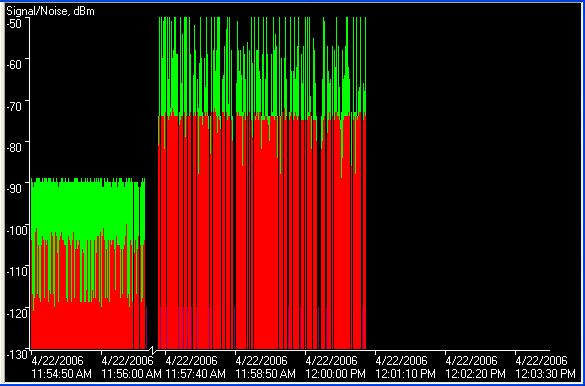
It looks as good or better than the commercial dish. There is more usable
siganl after the amplification.
This web page is a work in process. I hope it gives people ideas about
what is possible.
Back
<>
<>